DIY Geometric Garland out of Vintage Sheets
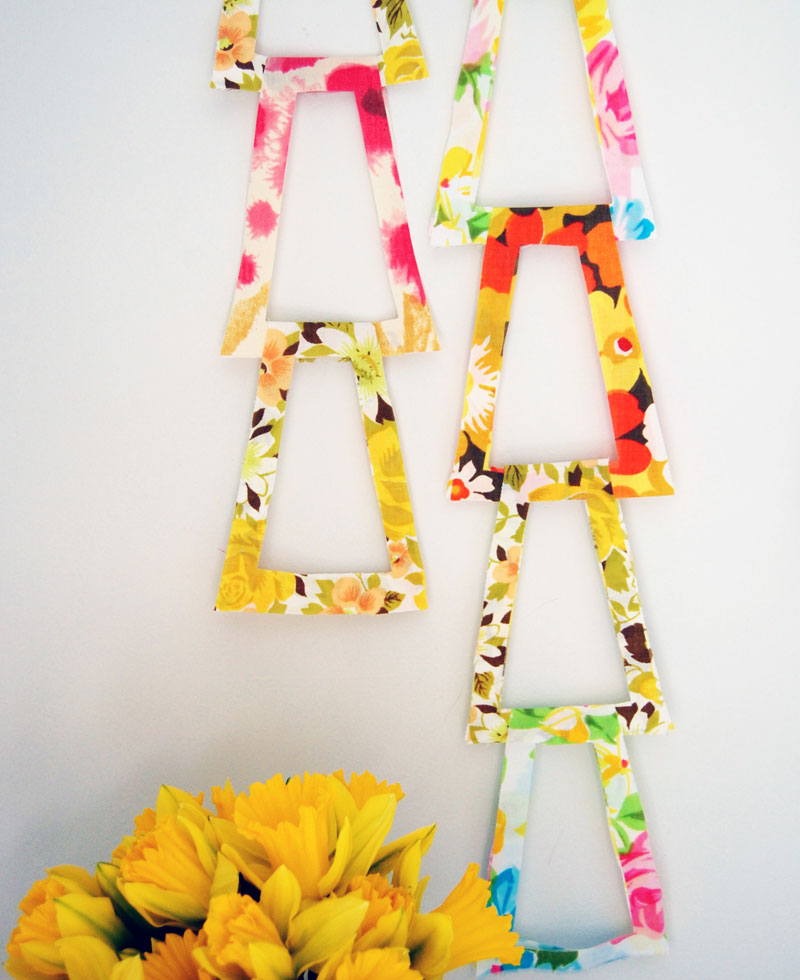
I was quite entranced with Spring this past weekend, Seattle truly outdid itself with beautiful weather! We had dinner on the beach (I, of course, brought home more rocks), we walked the neighborhood, dyed Easter eggs, and had Peep jousting wars in the microwave, and made our traditional Easter dinner of ham, carrots, asparagus, etc. I wanted to make the Easter table feel as Springy and came up with this garland after seeing a similar paper version in an old kid’s crafting book from the 1960’s. I love that it creates a really geometric shape and gives a new spin to everyone’s favorite triangular bunting shape. I think these will stay up for a while, I smile every time I pass them.
Here’s how I made them.
DIY Geometric Garland
Materials:
Floral sheets or fabrics (a fat quarter will yield at least 7 individual wedge shapes, if you are looking for floral sheets there are a few fat quarter sets left in my shop) All sold out, thanks!
Double sided fusible webbing
iron/ironing board
scissors both for fabric and paper
Pencil or pen to trace with (I use Frixion pens, which allow me to write directly on the fabric, but the lines disappear with the heat of the iron. Disclaimer: I have been warned that the pen marks will return in very cold temperatures. I’ve yet to ever have this happen, but if it ever did, a little heat from an iron would make them disappear again)
Ruler
To Make:
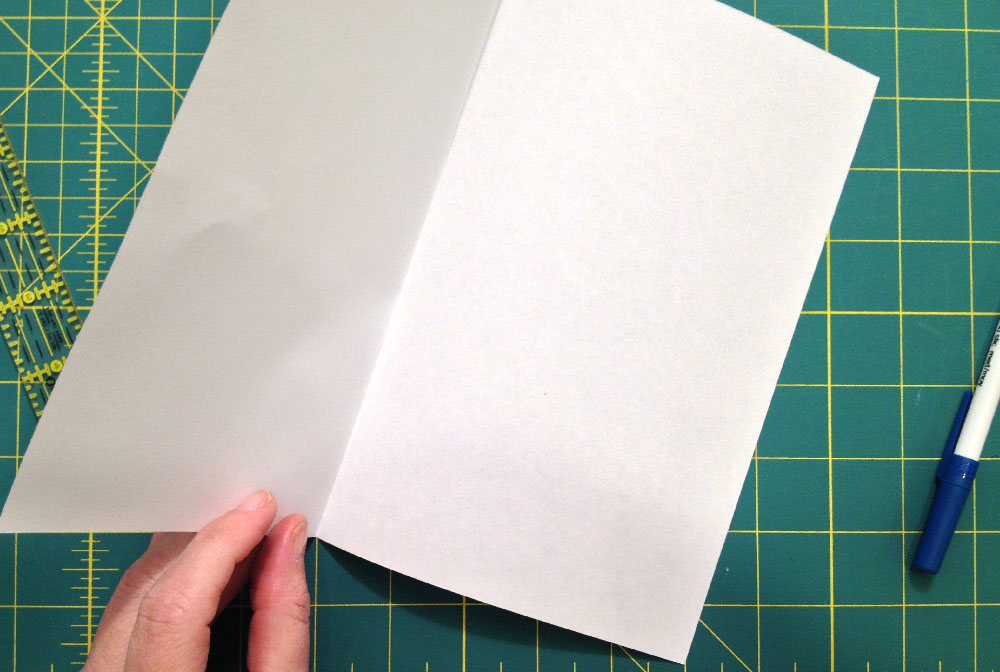
Fold an 8 1/2″ x 11″ sheet of paper in half, lengthwise.
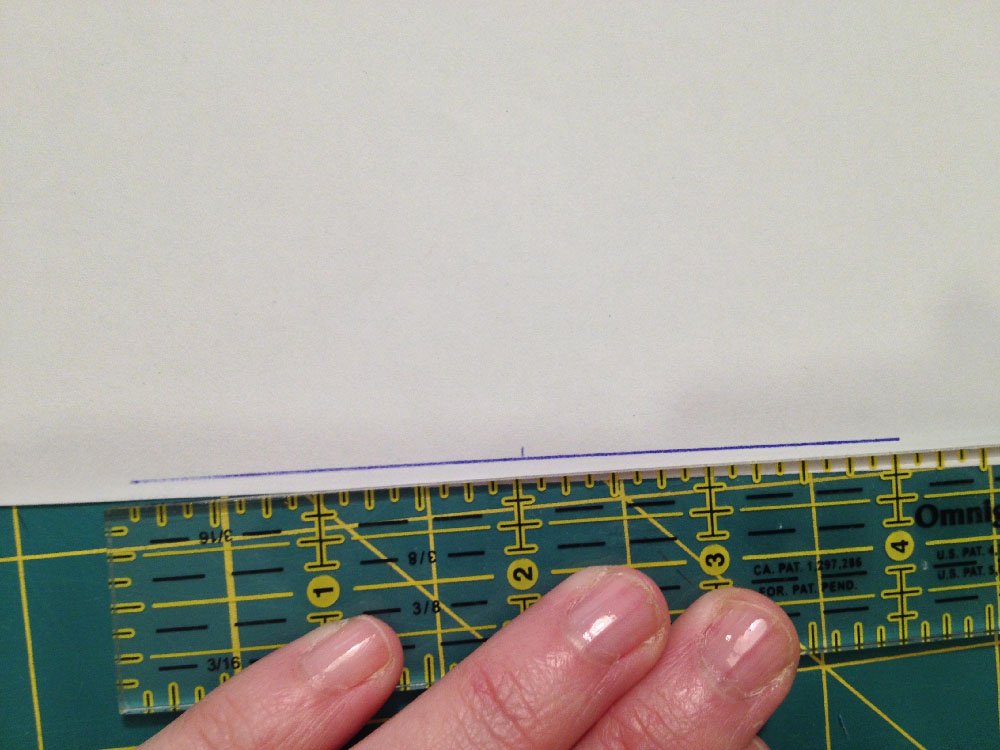
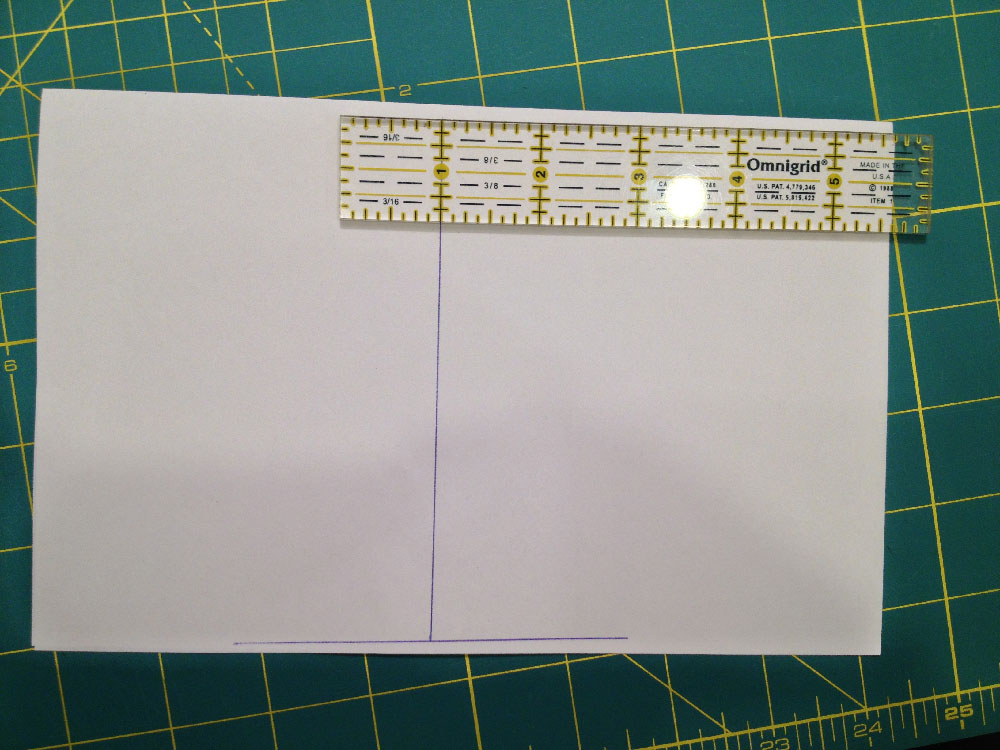
Draw a 4″ line across the center bottom (the side opposite the fold).
Mark the center of that line, then draw a vertical line from that center point up to the fold.
Next draw a 2″ line at the fold, perpendicular to the vertical line you just drew.
Connect the sides with vertical lines.

Repeat this shape inside the first shape, 1/2″ from all sides.
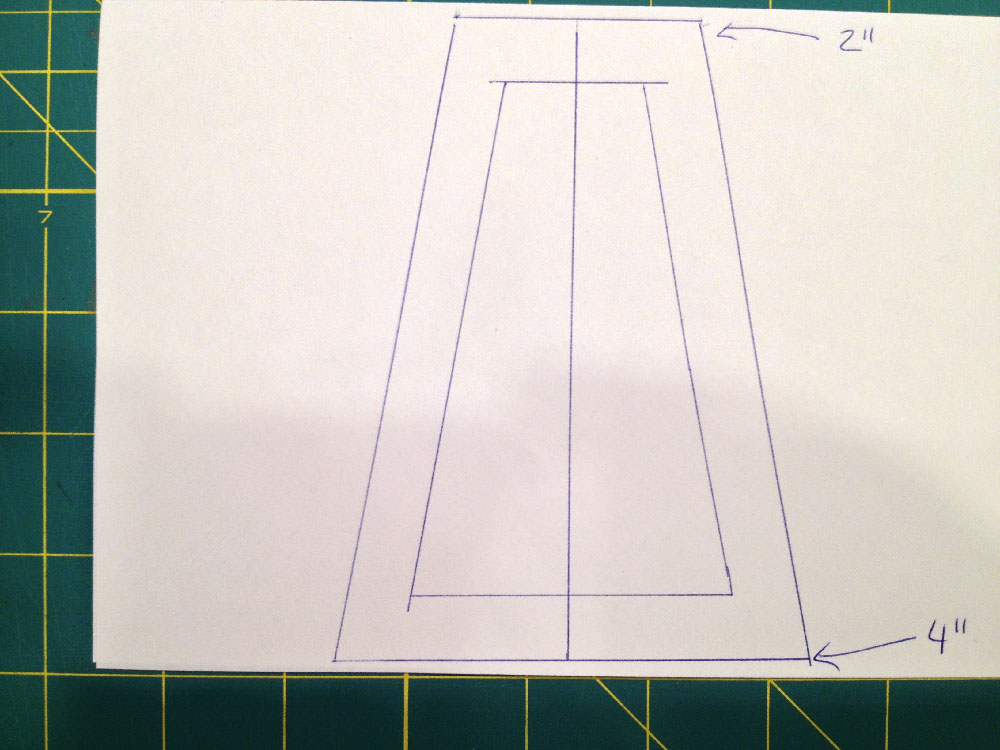
Cut out the shape through both layers of paper, but do not cut the fold. You should have something like this.
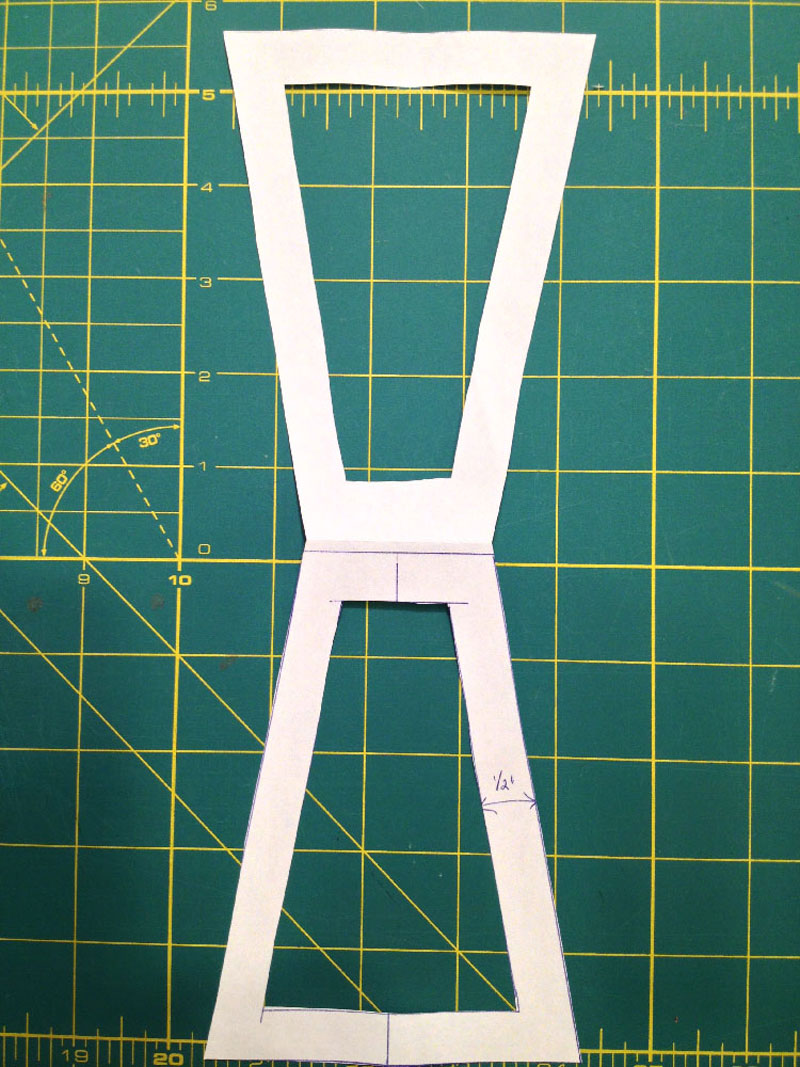
Add a square of double-sided fusible webbing about the size of half of this shape onto the back of your fabric, as shown below.

Trace the entire shape onto the back of your fabric.
Cut out.
Carefully fold the shape onto itself, and iron to adhere the webbing.
Repeat with a new piece, but feed it through the open portion of the first wedge shape, then adhere it to itself.

Continue to make your garland as long as you want. These look best with several hanging vertically down the wall at different lengths.
If you make them, please tag them #wisecrafthandmade on social media so we can see them!
Rossie
April 1, 2013 at 8:40 amThis is so rad! I can imagine this would be a great use of scraps of all kinds!
Jean
April 1, 2013 at 9:32 amThe weather so sooooo wonderful! I hope we get more days like that!
sewkatiedid
April 1, 2013 at 10:14 amLove the vintage sheets and the shape! Are you going to come to Vashon for any of the workshops with Jacquie and I?
Molly
April 8, 2013 at 8:14 amokay, those are just so stinkin’ cute. sixties’ sheets never had it so good!
happy spring, blair!
molly
blair/wisecraft
April 8, 2013 at 2:51 pmThank you Molly! Happy Spring to you! xo