The Outback Value -A Free Quilt Pattern For You
Some of you may be looking at the Outback Value Quilt at Quilt Market in Houston right now. If you are, will you hug it for me? I love this quilt so much, due in no small part to the amazing fabrics that it is made with. It is made with Outback Wife, a beautiful new line of fabrics created by Cathi of Gertrude Made for Ella Blue Fabrics.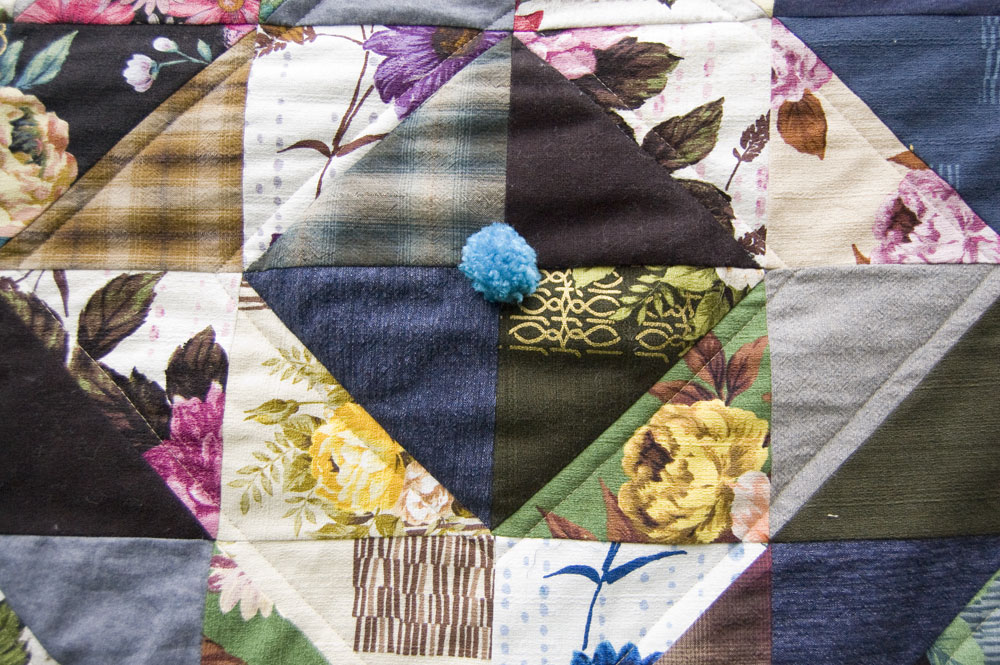
The very best part of these fabrics is that they are barkcloth! Probably a broken record by now, but I love to work with vintage fabrics of all kinds. Vintage barkcloth is one of my favorites though (there is a project in my next book made with vintage barkcloth). Its quite colorfast and holds up well over time. The trouble is always finding enough of it to make a quilt from. When Cathi told me of her new fabric line and asked if I would make a quilt from it, I immediately said yes!
The Outback Wife collection is full of vintage-inspired florals, and I received 4-5 color ways of each pattern. Cathy has also included a few indigo solids and beautiful plaid patterns. You can read more about the fabrics and the inspiration behind them on Cathi’s blog. I approached this project like I did most projects in my book. Making a quilt with many many different fabrics of all different colors is a challenge, and I like to work with the color values to find cohesion. My friend Katie introduced this technique to me years ago and I really have to credit her with opening my eyes to the importance of value in quilt making.
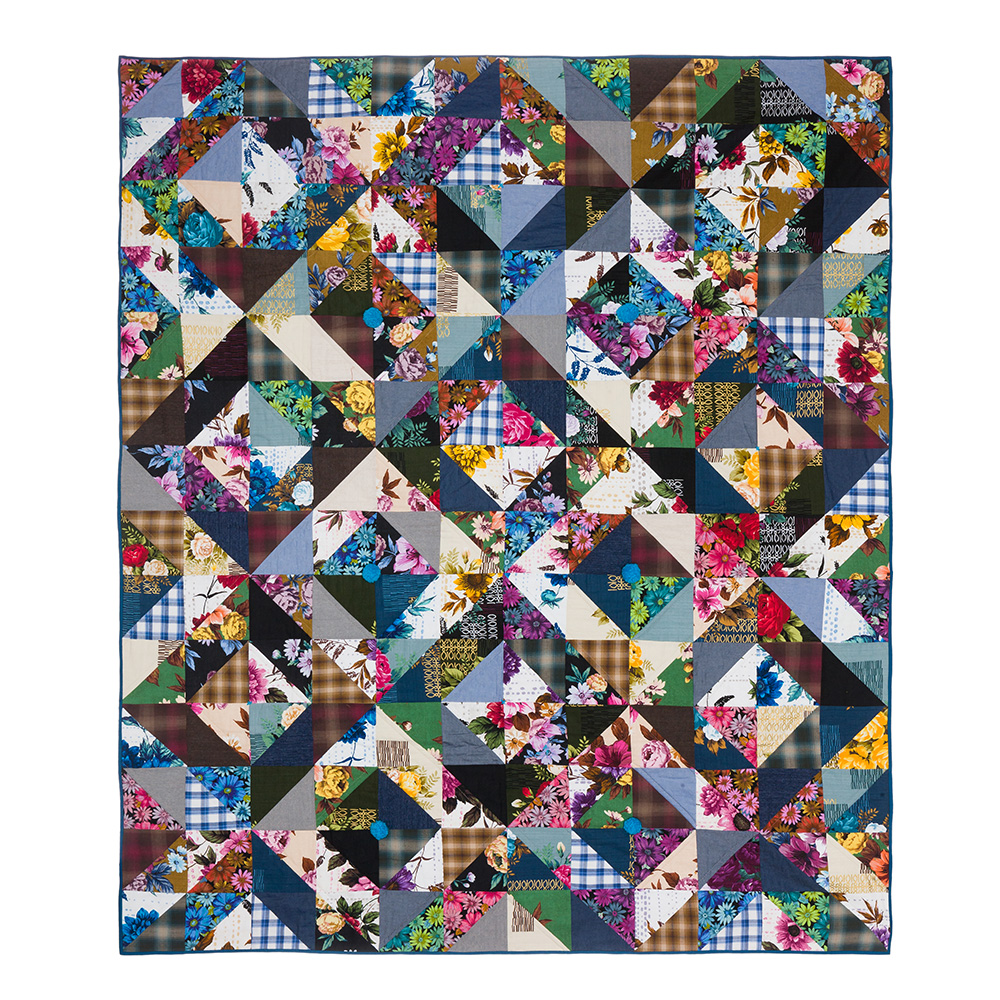
I divided all the prints into two piles, one light valued and one dark valued, and that step is the basis for this design. When you work with value in a quilt, the more fabrics included the better. It makes the light and dark values really stand out more. Also, keep in mind as you create your two piles that one fabric could read as light or dark, depending on what its paired beside. For that reason, you may want to put some fabrics in both piles.
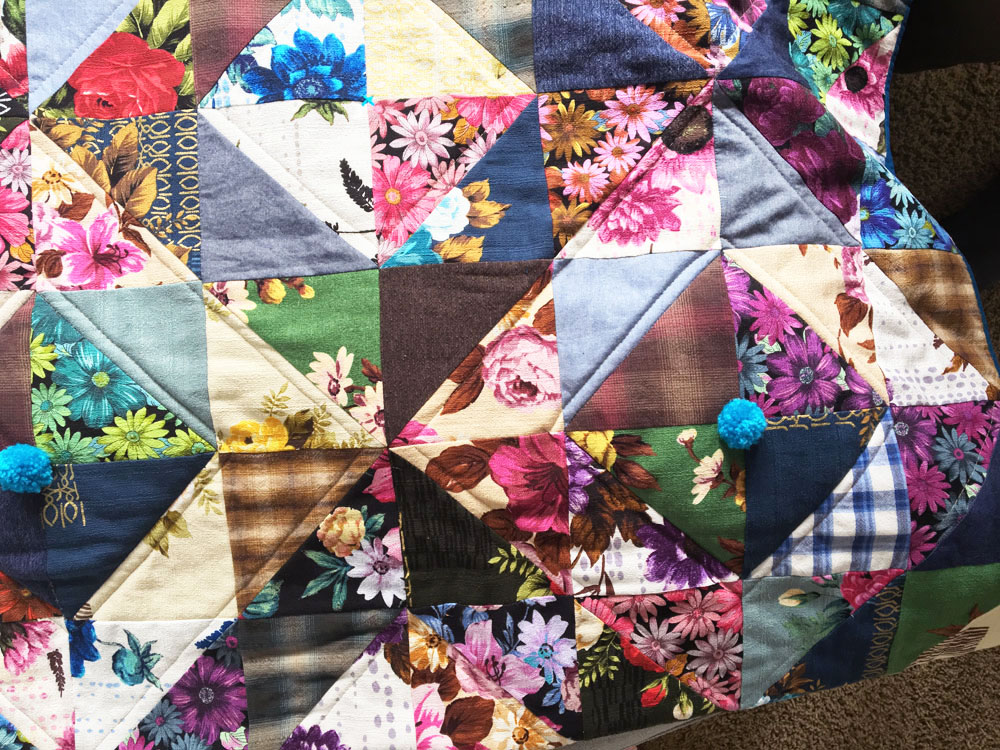
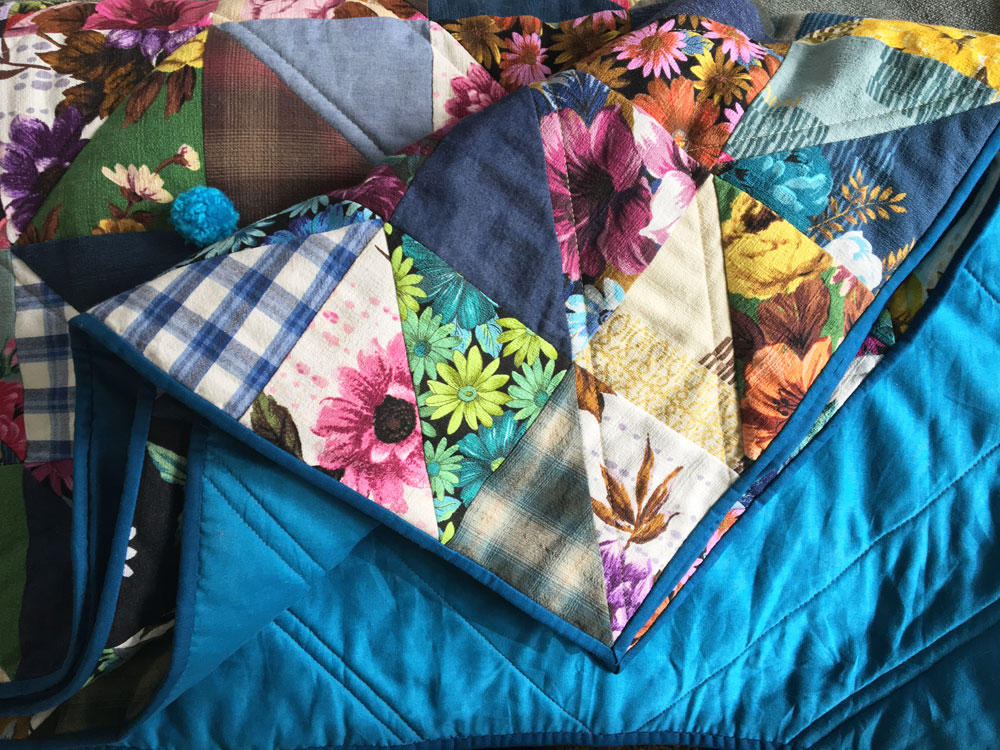
The other thing I like to do is add surface interest to my quilts when it seems to make sense. I didn’t have time to do any involved quilting for this quilt, but I actually don’t think it needed it. But I felt inspired to add some surface interest with pompoms and yarn stitched x’s. It seemed to lend itself to the overall feel of the quilt.

Outback Value Free Quilt Pattern
Fabrics Needed:
- 2 3/4 yards total of light valued fabrics*
- 2 3/4 yards total of dark valued fabrics*
- 1/2 yard solid fabric for binding (I used a dark blue)
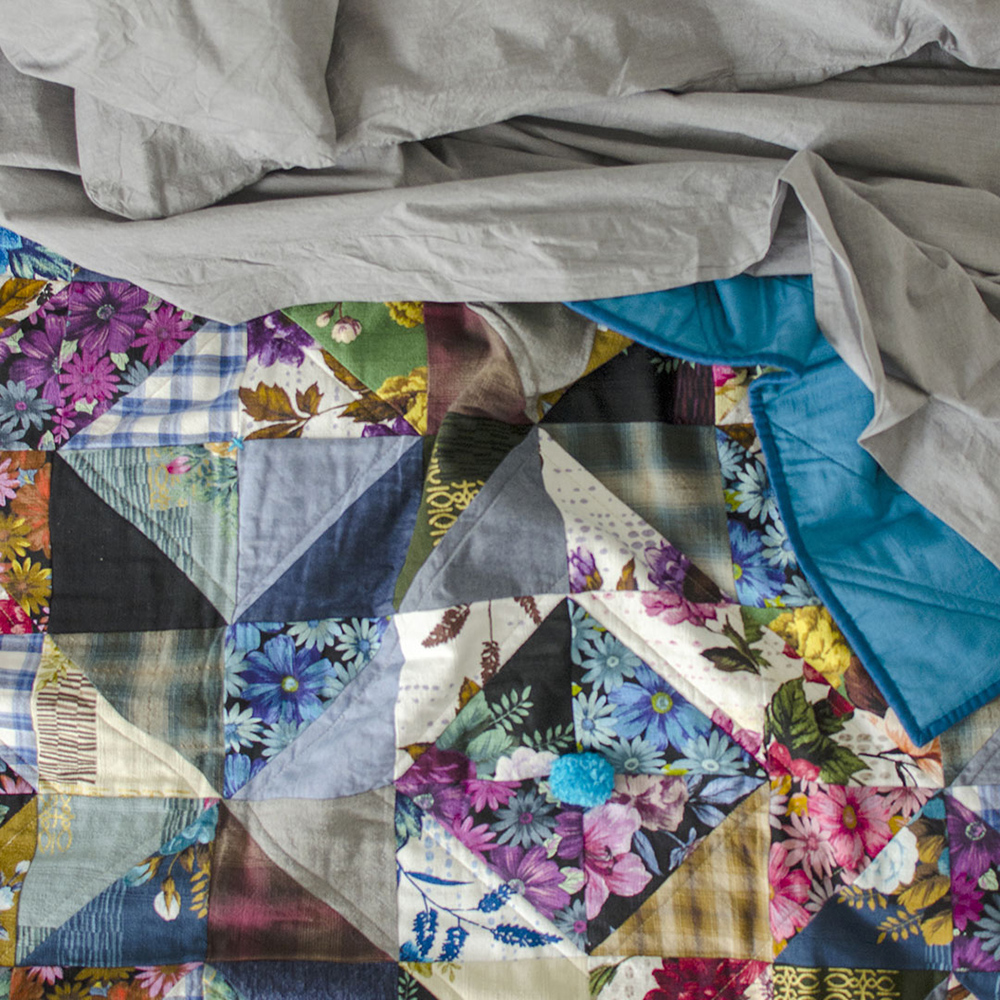
- 4 yards fabric for backing (I used a solid peacock blue)
- Batting measuring at least 54″ x 67″ (I prefer Quilter’s Dream Cotton low loft batting)
- Coordinating thread
*I used the complete line of Outback Wife, by Gertrude Made for Ella Blue fabrics. Sadly, this fabric is no longer available. But don’t despair! Look at all the beautiful scrappy versions that have been made! If you are pulling from your stash or buying fabric for this project, I suggest the more variety of patterns and values you have, the better this quilt will be.
Optional:
- My Ruby Ruler™ is a fantastic tool to use for determining the value differences in the fabrics you use in this quilt. It will also help with trimming the half square triangle units.
- Worsted Weight yarn to make pompoms and and X stitches (I used Bernat Sheepish in Turquoise-ish)
- LlamaLlooma Pom Pom Maker by Betz White
To Make The Outback Value Quilt:
Divide all the fabrics you have into two piles, light valued and dark valued. As you divide the fabrics, make quick decisions and don’t overthink this step. Use the Ruby Ruler by holding it up to your eyes as you look at your fabrics. It will help you determine which fabrics are more light value, and which are more dark (it can be deceiving!). Also keep in mind that some mid-ranged values can be read as dark or light in the quilt, it all depends on what they are paired with. Try putting some of these fabrics into both piles.
A. Cut all the fabrics-
Dark Valued Fabrics: Cut a total of eighty-four 6″ squares
Light Valued Fabrics: Cut a total of eighty-four 6″ squares
B. Create the half square triangle units-
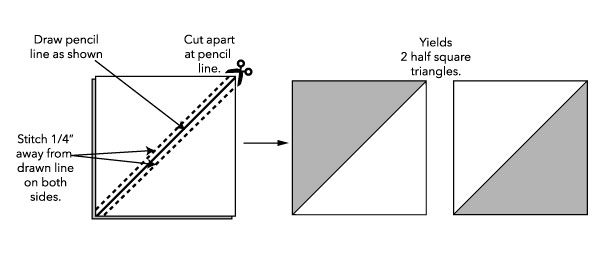
This quilt is composed only of half square triangles. To make two half square triangles from two 6″ squares-
A- pair one light valued fabric with one dark valued fabric, right sides together. Draw a diagonal line on the wrong side of lighter fabric.
B- Stitch a 1/4” away from and on both sides of the line.
C- Cut the square set into two triangles directly on the drawn line (see illustration below) to make two half square triangles. Press the seam allowances to the darker fabric (or press seam allowances open to help reduce bulk of the seams if using barkcloth).
D- Square up the blocks to be 5” square. Using the Ruby Ruler for this step will ensure accuracy. Just make sure that the center diagonal seamline is lined up with the diagonal line on the ruler before trimming.
You will need a total of 168 half square triangle blocks.
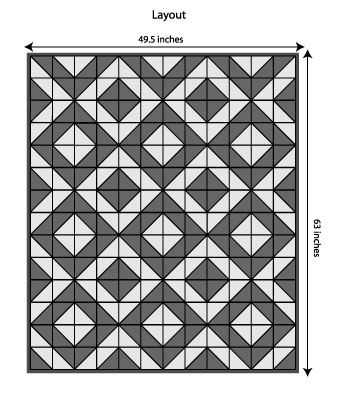
C. Lay out the design-
On a tabletop or, better yet, a design wall of some sort, lay out the design following the layout below. (I have instructions to make a portable design wall here.) It is very important to stand back from this layout often, looking at the entire design from a distance. Often the value differences do not show up well when you are looking from close up, but emerge immediately when you stand back.
D. Sew quilt top-
I constructed this quilt in rows, constructing each row from right to left and pressing each row’s seam allowances in the opposite direction.
Sew the rows to each other, from top to bottom.
E. Create the quilt sandwich.
Measure out and cut fabric for quilt backing. The backing and batting should be a total of 4″ longer and wider than the quilt top. I have a favorite method of basting my quilt layers together on a tabletop explained in this post.
F. Quilt the layers.
I used my walking foot with the edge of the foot as a guide, Quilted straight line outlines around the light-valued diamond shaped areas as shown below.

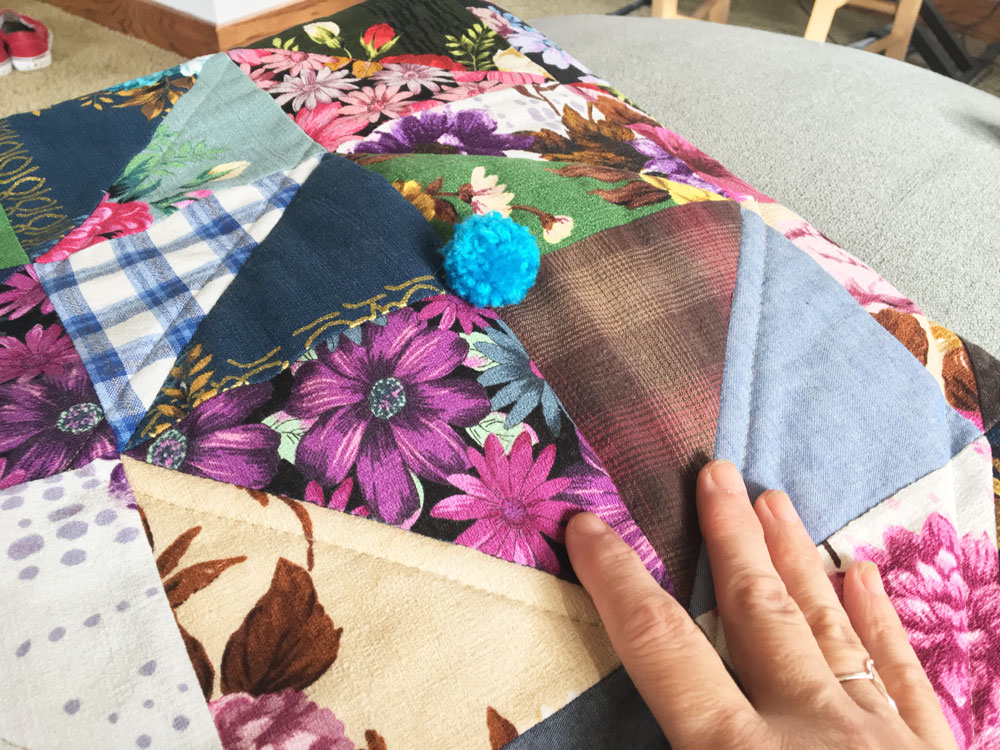
G. Add pompoms and big stitch X’s- Optional
I created 6 pompoms from the turquoise yarn and added them in the center of each small dark diamond. Do this by leaving 2 long tails on the pompom and threading them each through a large needle. Insert the needle through all layers, working from the front of the quilt, and pull each tail to the back at the center seam. Tie with a square knot and cut the tails to around 1 1/2″ long.
I also large X’s stitched into the center of each small light diamond. I did this by coming from the back up through the front of the quilt, through all layers, and making two diagonal stitches that cross right where all four of the diamond’s squares intersect. Tie the tails on the back of the quilt. Tie with a square knot and cut the tails to around 1 1/2″ long.
H. Bind it.
Use my favorite binding method by following the how to on my YouTube channel. Works like a charm!
And last but never least! Don’t forget to add a label to the back of your quilt! I show how I add labels in this video.
Please let me know if you make this #outbackvaluequilt by adding the hashtag on social media, and tagging me on Instagram. Make thanks to Ella Blue and Cathi for allowing me to play with the beautiful new Outback Wife fabric collection!