Boro #wisecraftstitchalong Week Two
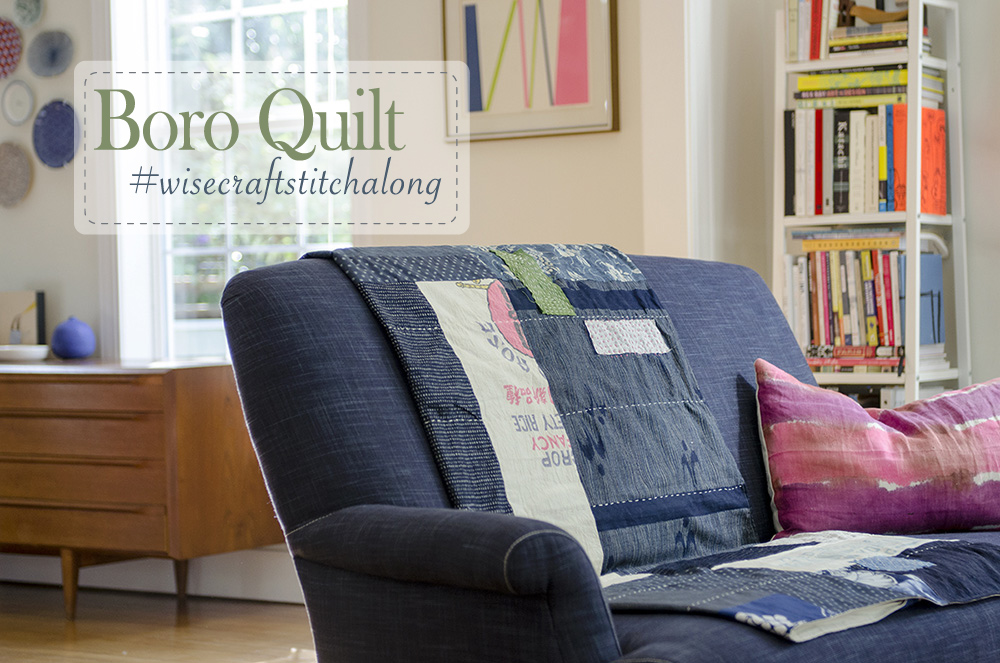
Welcome to Week Two of our Boro Quilt #wisecraftstitchalong. If you are unsure as to what this is, or want to start at the beginning of the stitchalong, read all the details here.
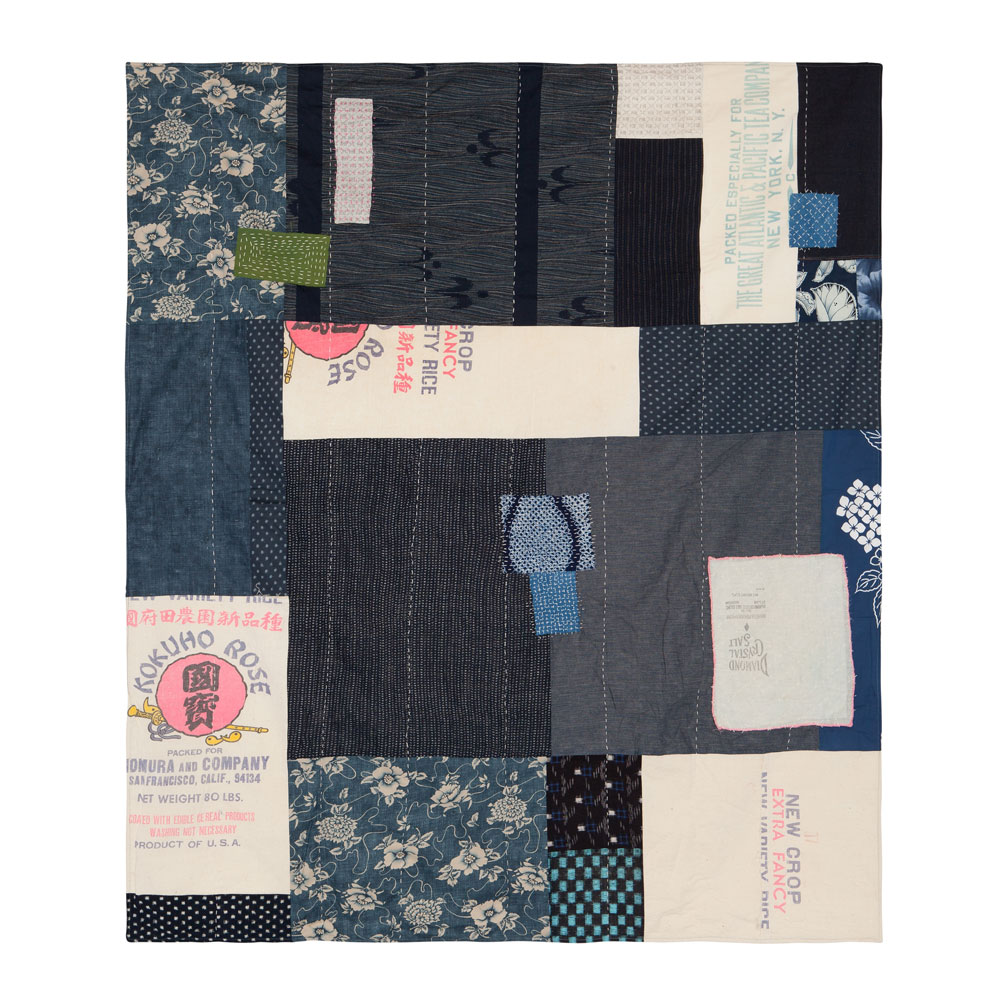
This week we will start construction of our quilt top. I did a **live video in the Wise Craft Quilts group and started construction of the new version I’m making. I also talked through some design decisions and answered questions.
Last week, we picked our color palette. Thinking about what the foundational, or most predominant color would be. This was the palette I started with, which I later tweaked a bit (I show what I ended up with in the Week 2 FB Live video).
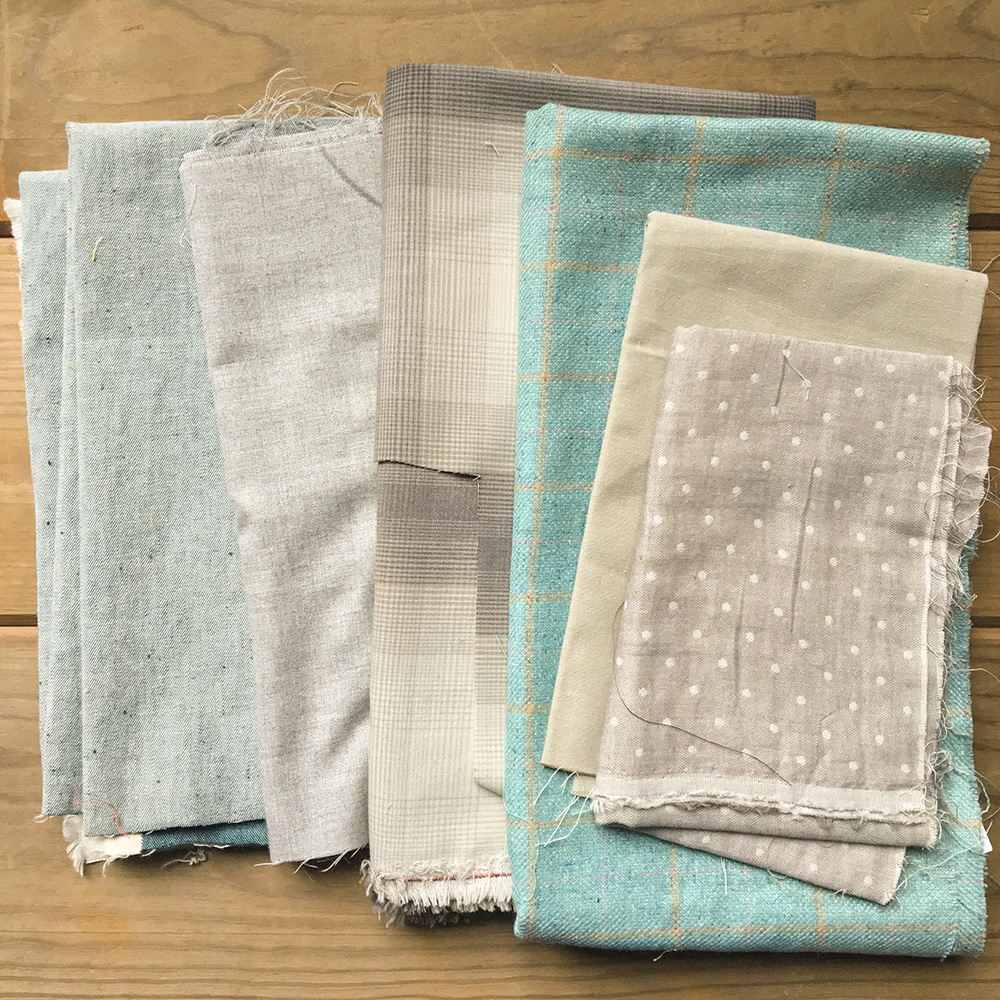
Very different palette from the dark blue, denim-inspired one from the book! I pulled some supporting colors too, but I’m not sure about them, still tweaking. Always tweaking.
Review Week One
At this point- just prior to construction, but after choosing your colors- I recommend thinking ahead a little bit. We will be adding some hand stitching to our quilt top once its constructed. Its a beautiful way to add texture and contrast, and makes this quilty version of a Japanese Boro more authentic to the patched idea that makes it so beautiful.
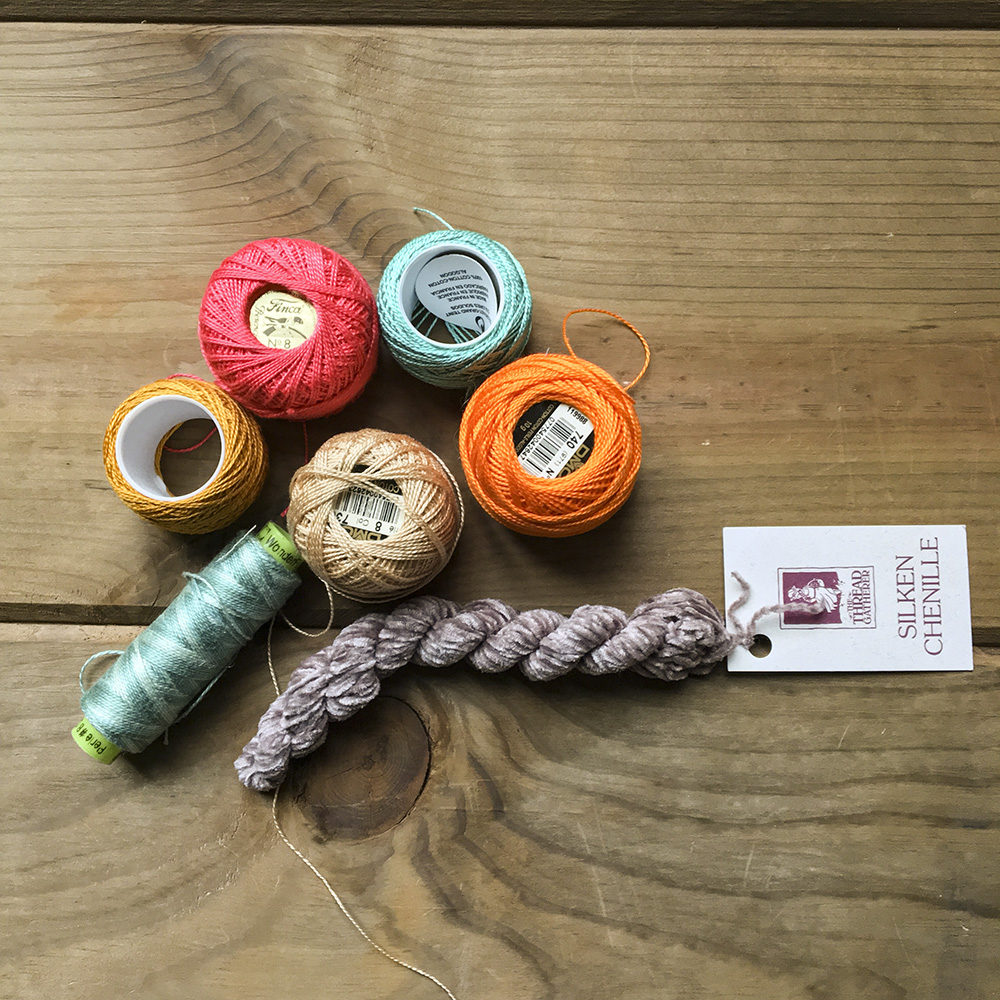
I’ve picked a few perle cottons, some variegated and specialty threads to keep close by as I’m constructing the quilt top. I will use a few different colors to add hand stitching details later.
The construction details for this quilt are in my book, Wise Craft Quilts. It will guide you through the entire process of making the quilt top. I explain in the book, but I start designing improvisational quilts like this from the center of the design and work outwards. Its the way I always do improvisational piecing. You could just as easily start at top or bottom of the layout.
Purchase Wise Craft Quilts
My biggest piece of advice-
if you are starting from the center like me, is to make the first piece a favorite piece of foundational fabric. Its likely the one you will see first when you look at the finished piece, the part that will likely show when the quilt is folded.
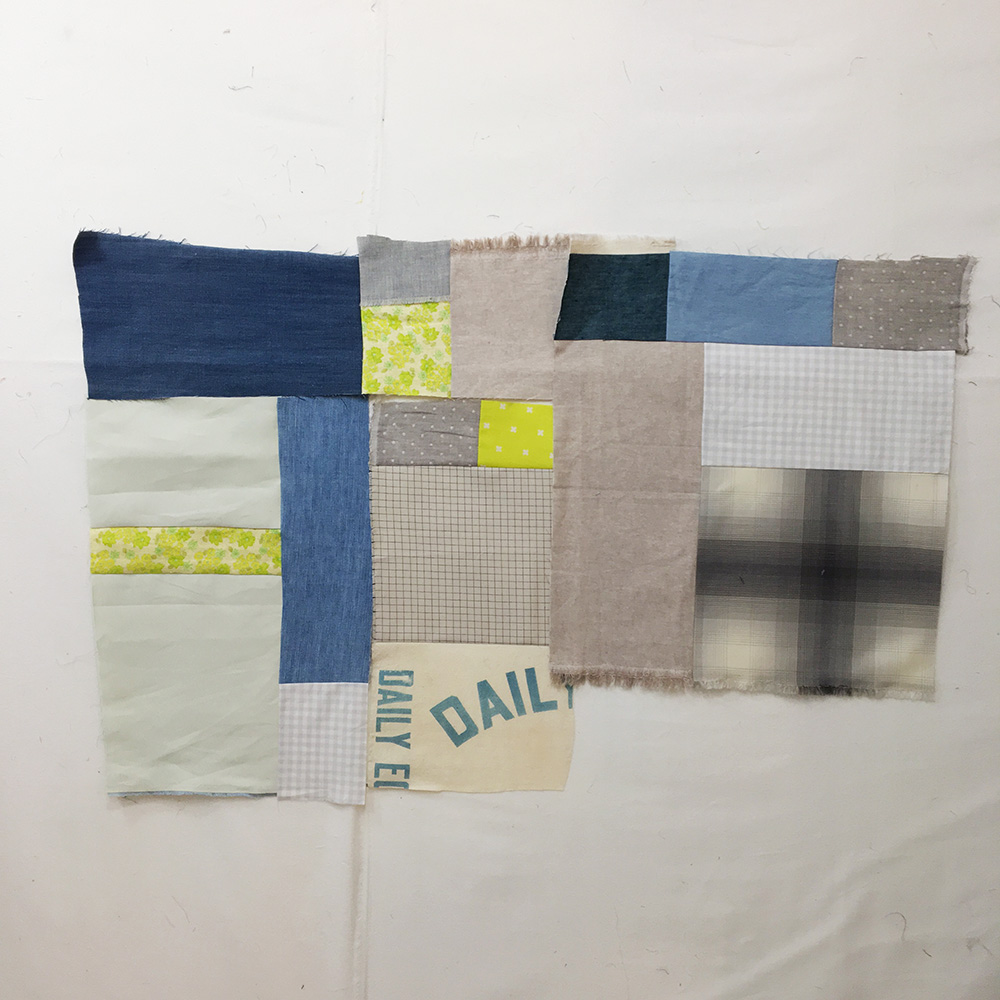
Above is what I have constructed so far. This quilt top comes together FAST! Especially if you use bigger pieces of your foundational fabric. (I think my biggest piece is approximately 12″ x 14″ so far.)
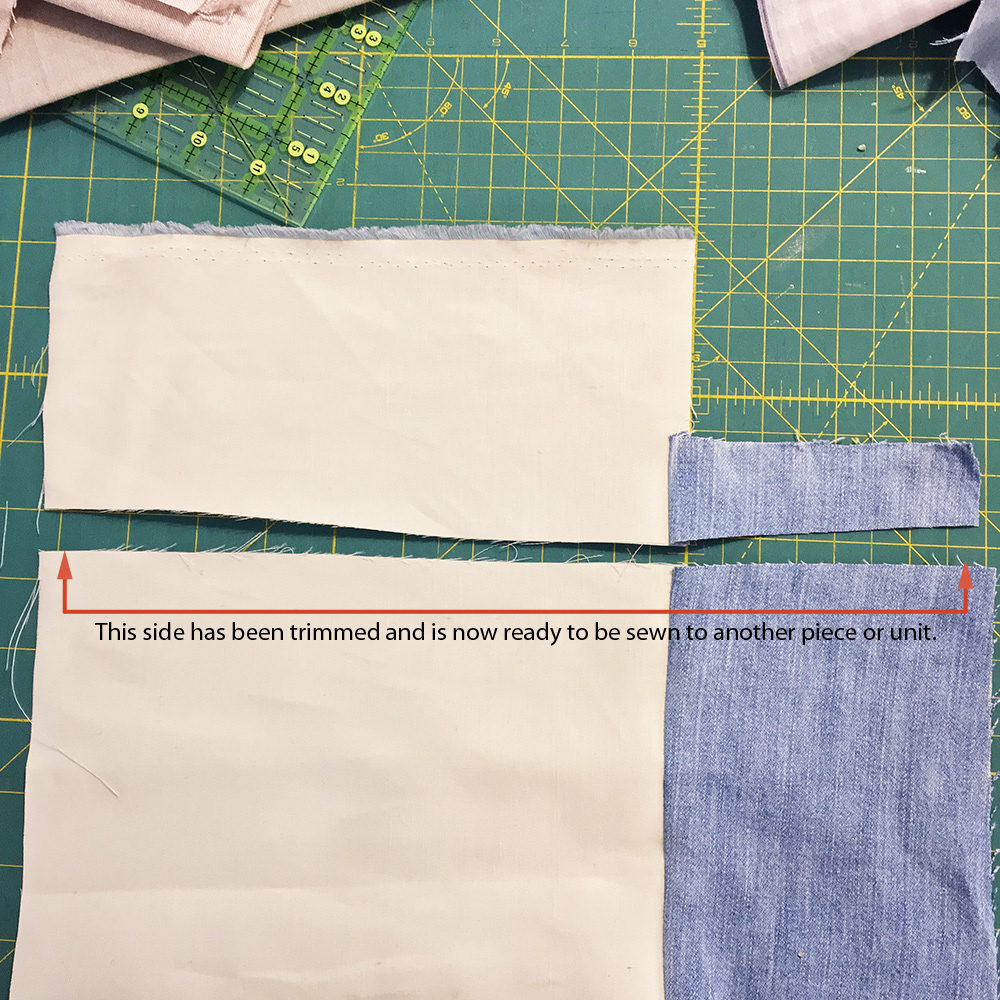
Sew with a 1/4″ seam, just as with any patchwork construction. The biggest difference in the way this is constructed is that you will sew two pieces together, regardless of whether one is larger or smaller than the other, press the seam allowances to one side or open (your preference), and trim one side of the joined unit even. This will get it ready to add the next piece(s).
Create a unit with a a group of fabrics, sew it together. Create another unit and decide how you will join the two units. Keep playing this way, sew more units, add pieces to make them fit together to what you have as your center unit, etc. and you will begin to build your quilt top.
The next FB Live video will be in the Wise Craft Quilts group next Wednesday, 11/14, at 4:30pm Pacific Coast/Seattle time. All lessons and posts outside of our FB group will live in this post.
Follow me on Instagram for updates over there
**Members can watch the video replay in the Facebook Group by going to the group page and clicking on “video” on left side of screen for desktop, and clicking on “albums” on mobile.