The Signet Baby Quilt- A Free Pattern for You
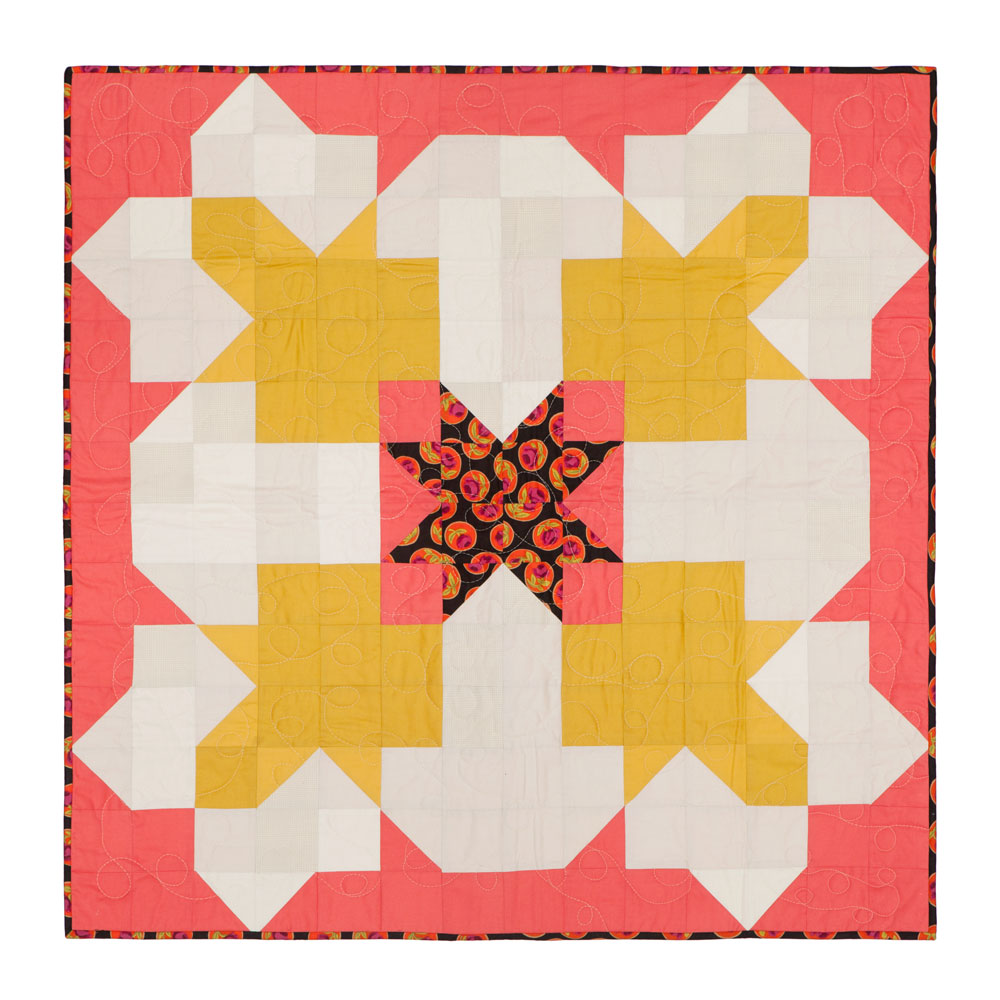
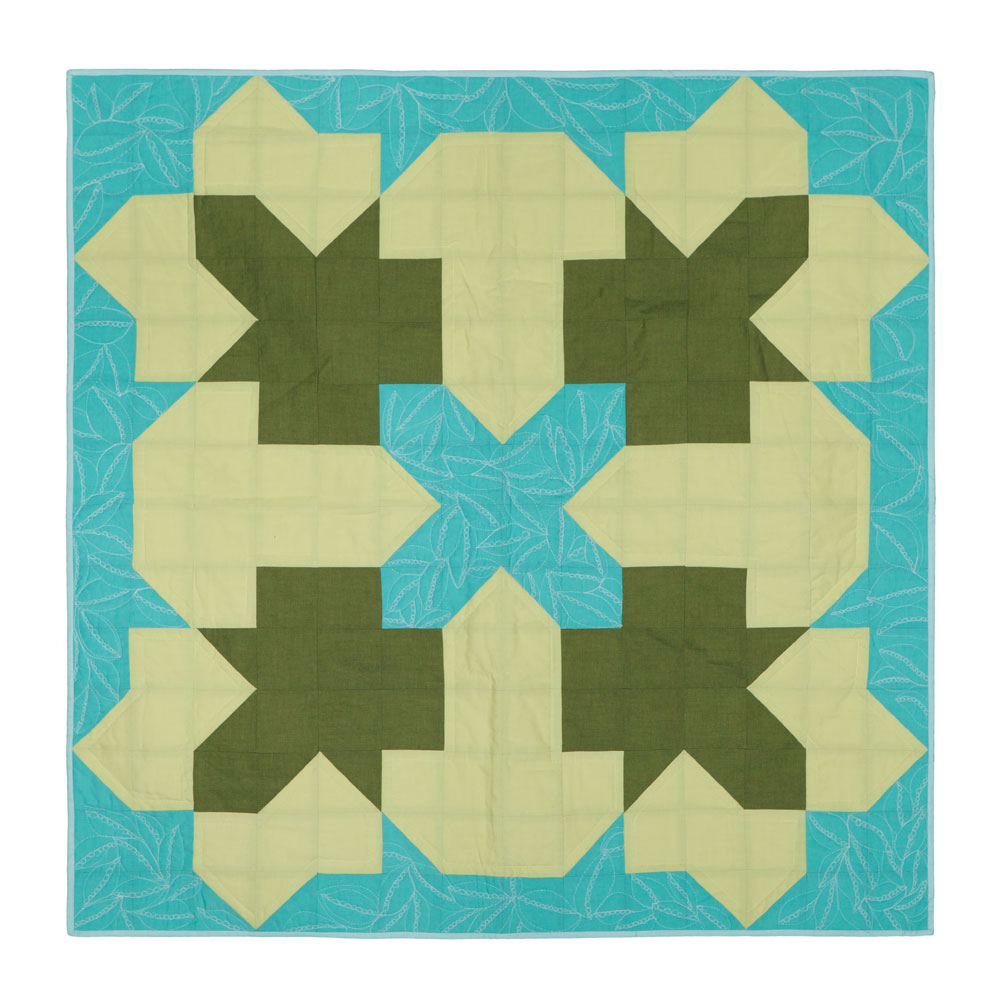
Quick and fun, that’s what this baby quilt is. Sized to be either a wall hanging or a stroller quilt, it can be scrappy or made nice and uniform with three of your favorite colors. If you want to make a scrappy version, just pick a few different shades for each color, instead of using all one color. That’s how I made the warm-colored version, pictured above. The cool version, below, has a more limited color palette and some more elaborate free motion quilting on it.
Keep reading for the how-to, and be sure to tag your versions on social media with #wisecraftsignet so we can all share!
The Signet Baby Quilt
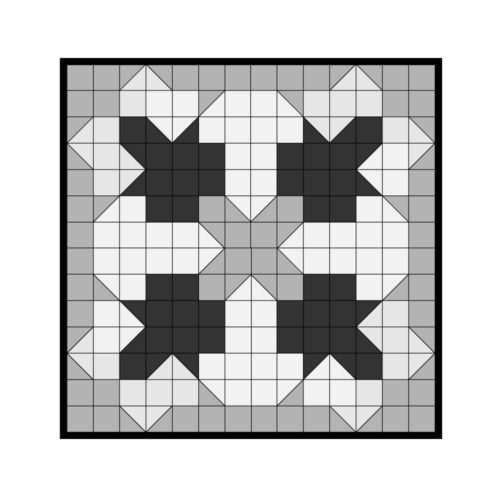
Finished Size= 35″ square (a wall hanging or a stroller quilt) :: Finished Block Size= 2 1/2″ square (Note, the layout illustration below shows the center squares all done in the medium color fabric. In the photo above I changed those out to be a contrasting star for fun.)
Fabrics needed:
Dark Fabric= 1/2 yard or 2 fat quarters
Medium Fabric= 1/2 yard or 2 fat quarters
Light Fabric= 1 yard
*Scraps or a fat quarter of a contrasting print (Optional, for center star as in Version B)
Backing fabric= 1 1/4 yd
A. Cut the fabrics-
Dark Fabric: 3 1/2″ squares- 8
3″ squares- 36
Medium Fabric: 3 1/2″ squares- 16
3″ squares- 48
Light Fabric: 3 1/2″ squares- 24
3″ squares- 64
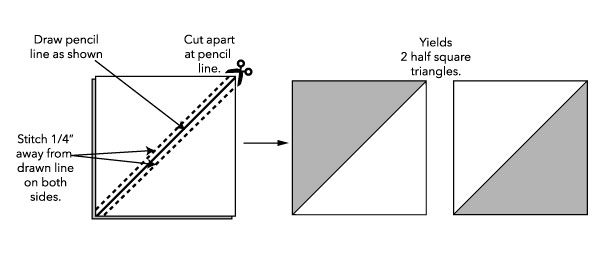
B. Create the half square triangles-
To make two half square triangles from two 3 1/2″ squares, pair the fabrics as noted below, right sides together. Draw a diagonal line on the wrong side of top fabric. Stitch a 1/4” away from and on both sides of the line. Cut the square set into two triangles directly on the drawn line (see illustration below). Press the seam allowances to the darker fabric. Square up the block and, if necessary, trim each block to be 3” square.
Using only the 3 1/2″ squares:
Combine 8 dark and light fabrics to make 16 half square triangles.
Combine 16 medium and light fabrics to make 32 half square triangles.
C. Lay out design-
On a tabletop or, better yet, a design wall of some sort, lay out the design following the layout.
D. Sew quilt top-
I constructed this quilt in rows, constructing each row from right to left and pressing each row’s seam allowances in the opposite direction.
Sew the rows to each other, from top to bottom. The seams should nest together and line up.
E. Create the quilt sandwich.
Measure out and cut fabric for quilt backing (the beauty of this quilt is that you won’t need to piece fabric together for the backing.) I have a favorite method of basting my quilt layers together explained in this post.
F. Quilt the layers. On this one I just free motion quilted squiggly lines and circles over the entire quilt.
G. Bind it. I show my favorite binding method on my YouTube channel. Works like a charm!