Granny Square Sampler Project- Week 18

(All the granny square assignments can be found on this page.)
I just looked at the Flickr group at the finished afghans, GORGEOUS! Wow! I am so glad you guys kept going with it and didn’t wait for me to post. I love how different each one is!
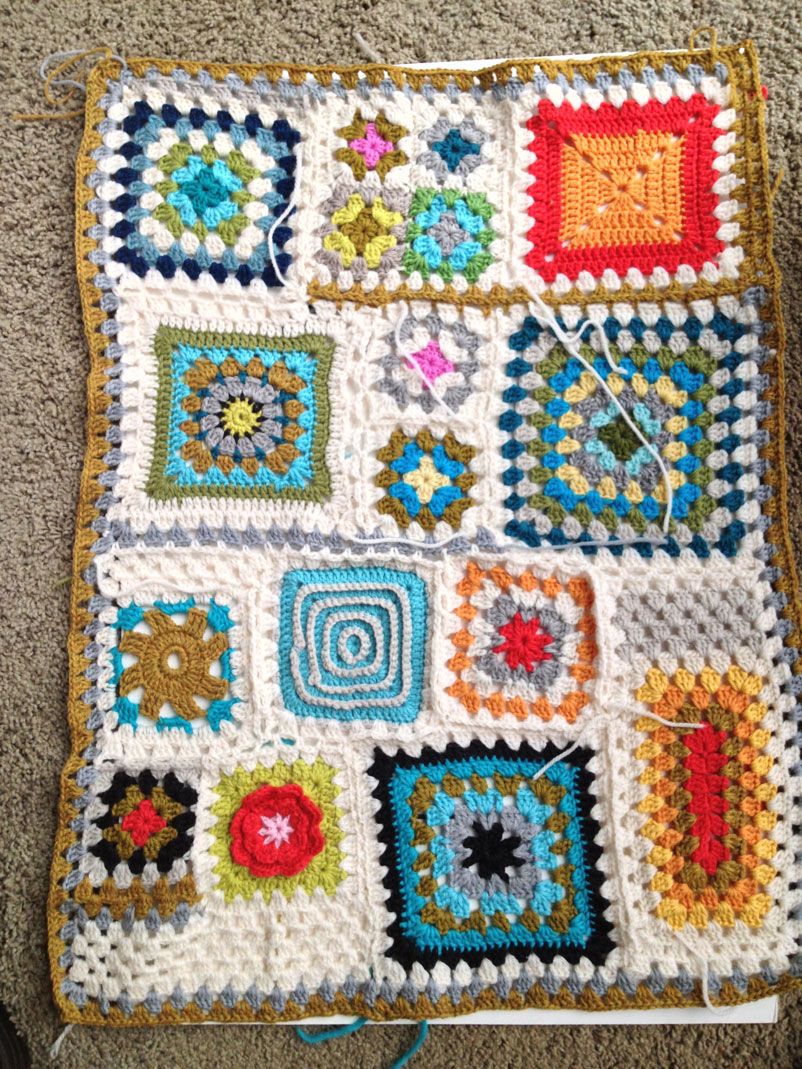
After a busy couple of weeks that left me painfully short on crochet time, I was finally able to pick my sampler back up this week. I’ve now joined and completed the inner rectangle portion of the sampler, and am now on to adding the rest of the squares around the rectangle. For anyone who is still working on joining their squares, I thought it might be helpful to share a few joining tips that worked for me, in case they might help anyone who is still joining. If you’re done, you just go pour yourself a glass of champagne and don’t mind us!
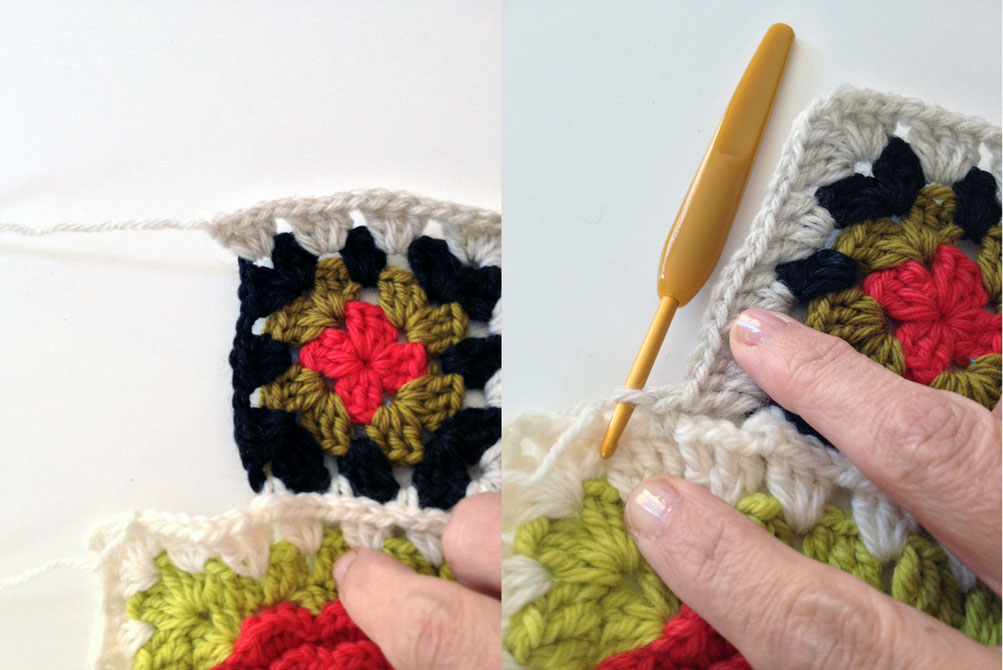
- In week 16, at the bottom of that post, I linked to a tutorial on how to beautifully join the squares (keeping in mind you can join these together as you like, using any type of stitches). Adaiha did a fantastic job in the tutorial of joining the squares using evenly space 3 dc “clusters” by doing some math first. I joined mine using this method in almost every case, but instead of doing the math, I eyeballed where my clusters of stitches should go. I think that this worked out fine overall and what doesn’t feel “square” I will coax into shape with blocking. (I discussed blocking in this post.)
- It has been so helpful to lay all these square out on a large piece of foamcore. I used a 20″ x 30″ piece and my finished sampler rectangle measures only slightly larger than that. It was great to be able to carry it, on the foamcore, to where I was working, then take the entire thing and put it in a safe place when I stopped for the night.
- Several times, I added a few extra 3 dc cluster rows in order to make up the size difference between the edges of two granny squares, like below (on the right, I have started to add rows of the oatmeal yarn). I had originally thought I would be doing all this “border” and “extra row” crocheting in cream, but I’ve changed my mind on that and am adding in several colors when it feels right.

- Once all the squares were joined together, I crocheted 2 complete rounds of 3 dc clusters around the entire rectangle (you can see the border in the top photo). One border round was gray, one was gold. In the original sampler, they have done 3 rounds, and used different stitches. Here is where you decide what you’d like to see in your sampler. Regardless, I think the border around this inside rectangle is a nice part of the overall design.

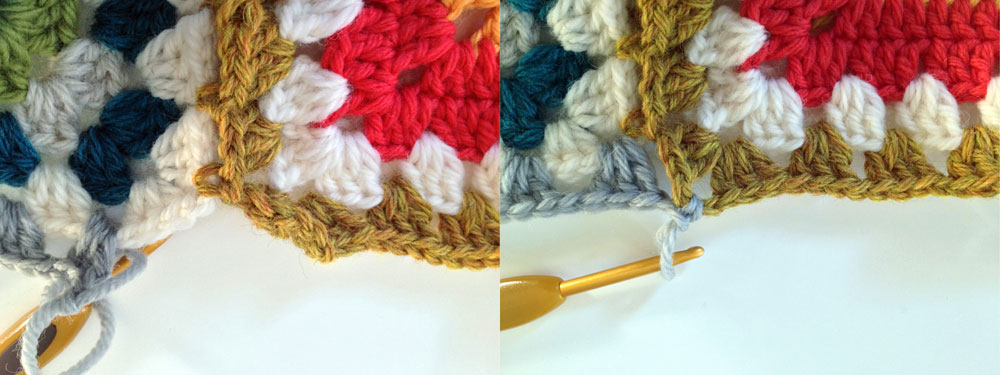
- You can see below that when I started crocheting the right border round, one square’s edge actually ended where the border would go, so I just connected the two, tied off, jumped over that square, started again, and kept going.

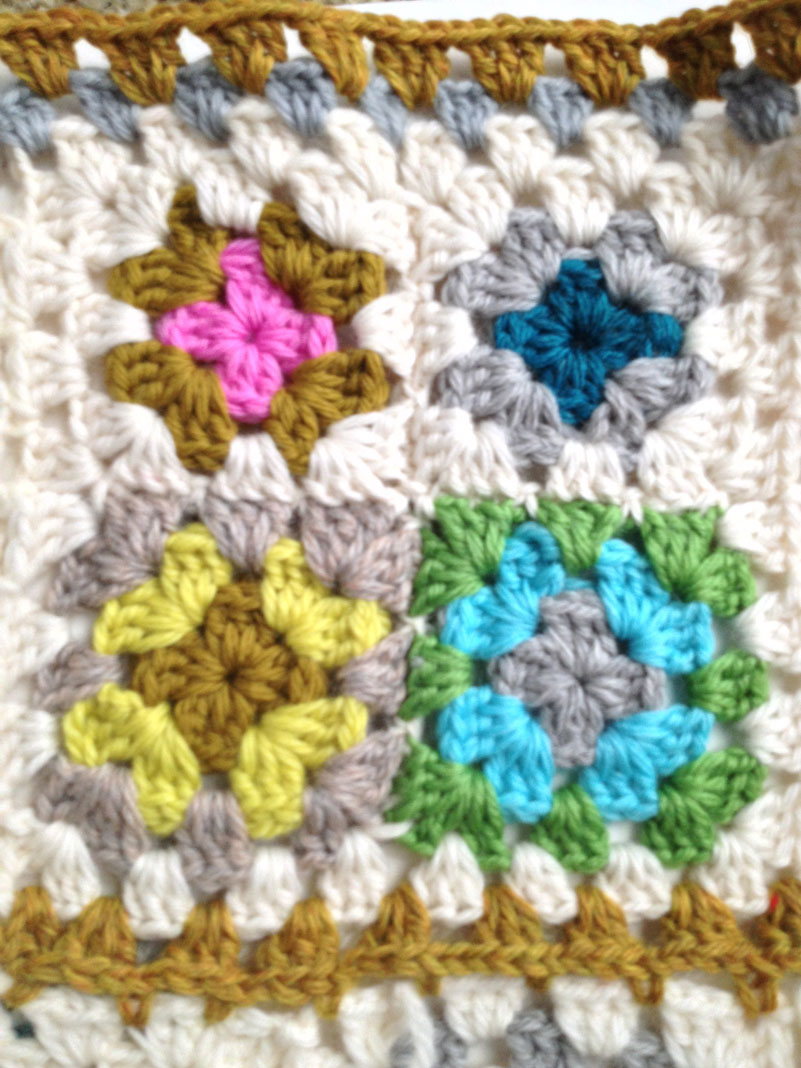
- Another way to join squares is to whip stitch the squares together, and I do it very similar to this video. The photo below shows 4 of the small granny squares from week 3 joined together this way. I did this a couple other times throughout the rectangle.
Over the next week, I will play with placing my remaining squares around this rectangle, and deciding if I need to crochet more granny squares. There is an even border of squares around the inside rectangle on the original sampler, that’s the look I’m aiming for.
At week 17, I put a call out to anyone that is doing this sampler with us to provide your links, which I am now adding to the project page. If you’d like to be added, just leave a comment in that post or here.
Reminders:
- post sampler photos to the Flickr group
- Instagram photos of samplers should have the hashtag #grannysquaresampler.
- All weeks of this project and other details are listed on the project page.
- As always, leave comments with your questions.
I’m really hoping to post a finished afghan next week! Wish me luck!

labrige
October 6, 2012 at 11:26 amI finished this afternoon the last border … I choose the simple finish crocheting from left to right ( I don’t find the translation of this “lobster crochet”).
It was so funny : my cat went on my knees while I crocheted, on the afghan, even when I have to turn at the corners …. and at the end, I wrapped her inside, and it was really a big surprise for us because she is a very very fast cat, always frightened, in hury and jumping everywhere, and never sleeping on our knees…. but she ran away when my husband moved to take a photo …She thougt he was going to give her something to eat …. (I don’t know if it is right to speak of my cat with SHE …. but it’s a female …. so …. in french, we say ELLE)
I will take a photo of the afghan tomorrow morning.
Thank for this “aventure” : I didn’t imagine it could be so interesting to mix in this way so different squares ….
Cristy
December 3, 2012 at 7:01 amVery nice I am working on my first Never Ending Granny Afghan and can’t wait to have it finished either,lol