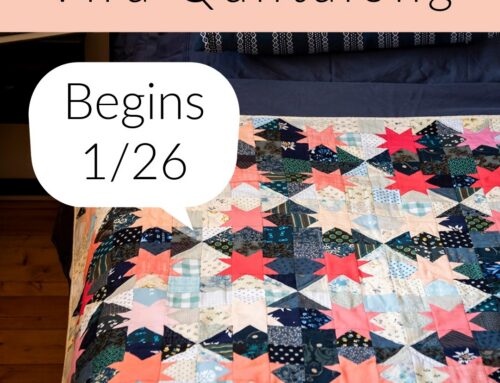

Have you heard of the Jelly Roll Race quilt?
If you haven’t, you’re in for a treat, because it is, quite possibly, one of the fastest quilt tops you will ever make!
Made up of 2 1/2″ wide x 44″ strips (or groups of designer fabrics together in a precut jelly roll, hence the name), can be made in an hour or two! I made the one pictured here, and it took a bit longer since I cut alot of my own strips. Read more about how I approached this quilt.
I was looking for a project to practice free motion doodle flowers on, and this seemed perfect for that.
What is a Jelly Roll and what does it have to do with fabric?
A “jelly roll” of fabric is literally a roll of 2 1/2″ x 44″ pre-cut strips of fabric, and a roll usually has 30-40 strips. These are usually created and sold in sets, to feature prints in one particular fabric line, and usually one or more strip of each print is included. Or possibly groups of, say, coordinating solids. A lap or baby-sized quilt can be made from 1 jelly roll.
I love to reuse and upcycle to create a more unique look. So I decided to create a jelly roll quilt with fabrics I already have in my stash. I went with a combination of both new and repurposed fabrics, and just cut my own strips. To make your own jelly roll strips, just cut 2 1/2″ wide strips across the width of any fabric (selvedge to selvedge). If the fabrics you are using aren’t 44 inches wide, you will just need more 2 1/2″ wide strips.
I already had a few jelly roll strips from a Denyse Schmidt fabric line which I purchased at the workshop I took with her. I also cut strips of a few Carolyn Friedlander fabrics.The rest are repurposed or upcycled fabrics. The bright blue corduroy was once a pair of JCrew pants, the gray was a pinpoint oxford shirt that had a stain. The pink check was formerly a thrift store blouse, and everything else is from my stash.

Jelly Roll Race Quilt Instructions
To make approximately a baby size or small throw, here’s how you do it:
Begin with 40-45 strips from either a precut jelly roll or ones you’ve cut yourself. (Looking to make a bigger size? Just add more strips into the mix.)
- Sew them together along their short ends, end-to-end, at a 45 degree angle. Cross two short ends over each other at a right angle, right sides together, positioned as in the photo below. For those fabrics pictured, I will sew a diagonal stitch line from the top left corner edge of the top strip to the right lower corner edge of the bottom strip. Continue on by adding the next one the exact same way, until you have sewn all of your strips together this way. You have create one looooonnnngggg strip, approximately 1600″ long.
- Trim all of the seam allowances down to 1/4″.
Note: There is really no need to pre-plan or worry too much about which strips get sewn to each other, or what will go where. Give a pre-cut jelly roll a little shuffle if identical fabrics are stacked consecutively if you’d like, but my advice is to just let the strips fall where they fall. You won’t be disappointed.

3. Fold the entire strip in half, lengthwise, and sew it all together using a 1/4″ seam to create an 800″ long strip (as I am doing in the photo above). Snip open the folded edge.

4. Continue repeating this step–folding the piece in half, stitching together lengthwise, and trimming the fold open. Watch the piece get shorter, yet wider, each time. Your quilt top is forming!
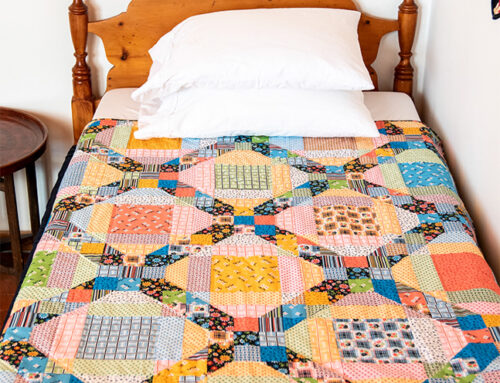
When your piece is the length and width size that you want your quilt top to be, you have completed your quilt top.
Why is it called a Jelly Roll “Race” quilt?
This type of quilt can be a fun task for friends, quilt guilds, etc. Because it goes really quickly, you can race each other to see who can finish theirs fastest.

After that, my quilt top just needed sandwiching together with batting and backing. The end result is a quilt I can practice free motion quilting some big flowers on. Which was the entire reason I made the quilt to begin with! But honestly, this is a great project to make a quick baby gift, use up precut strips, maybe a new quilt for your favorite pet.

If you need some guidance on finishing your quilt beyond just the quilt top (or flimsy) stage, I have an online quilting 101 class. It covers 2 ways to baste your layers, how to understand batting options, how to figure out and make your binding, as well as labelling the back of your quilt. You need to be subscribed to my email list to access the class, but sign up below and it’s completely free!