Here you will find all the links, information, and details for the Dash quiltalong. The actual quiltalong has concluded, but all the information is still available online, so you are free to create your own mini quiltalong! The entire event is divided into 5 weeks, creating a pace to make this quilt project manageable. It’s meant to grown your design skills, learn some new ways to design quilts with lots of different fabrics from your stash, and easy to enjoy!
To make the Dash quilt and follow along with the content, you will need to purchase a copy of the pattern (links below).
You may also want to pick up a Ruby Ruler®. It’s an optional design tool, and Blair shows how to use throughout the quiltalong.
Gather supplies
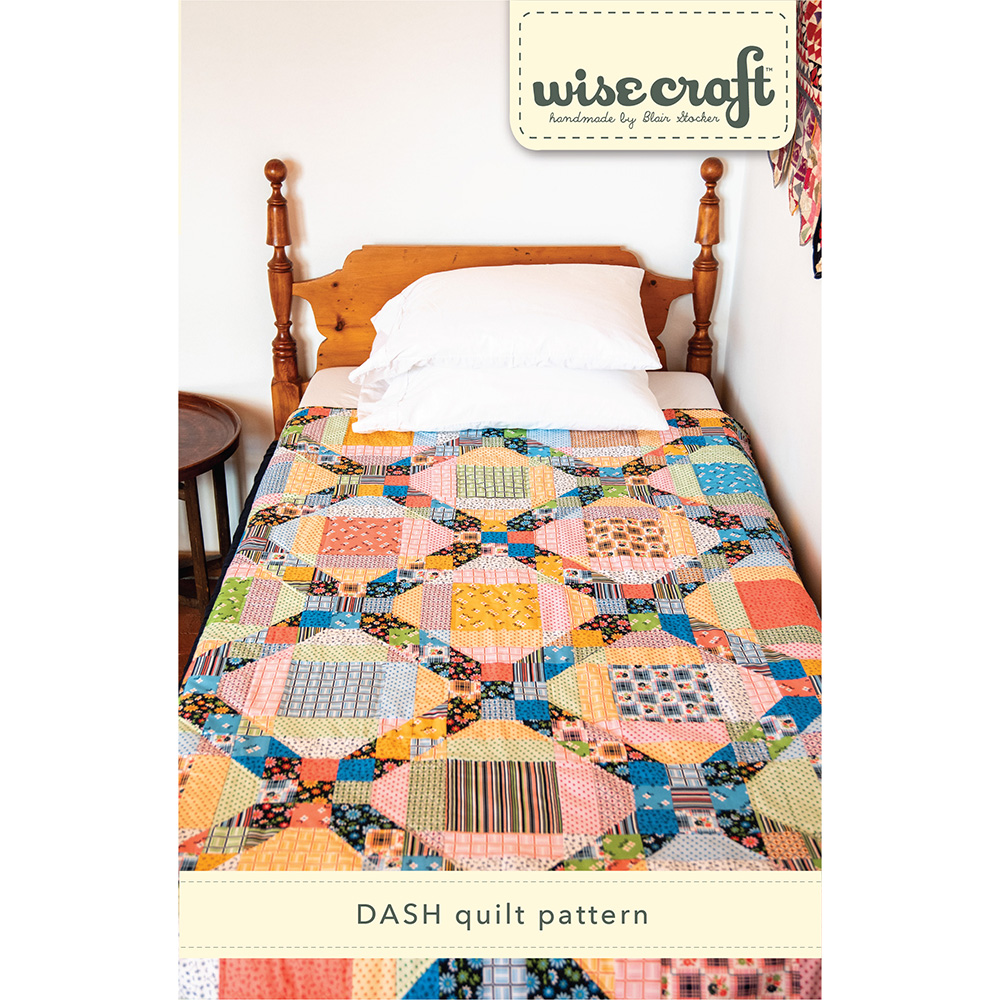
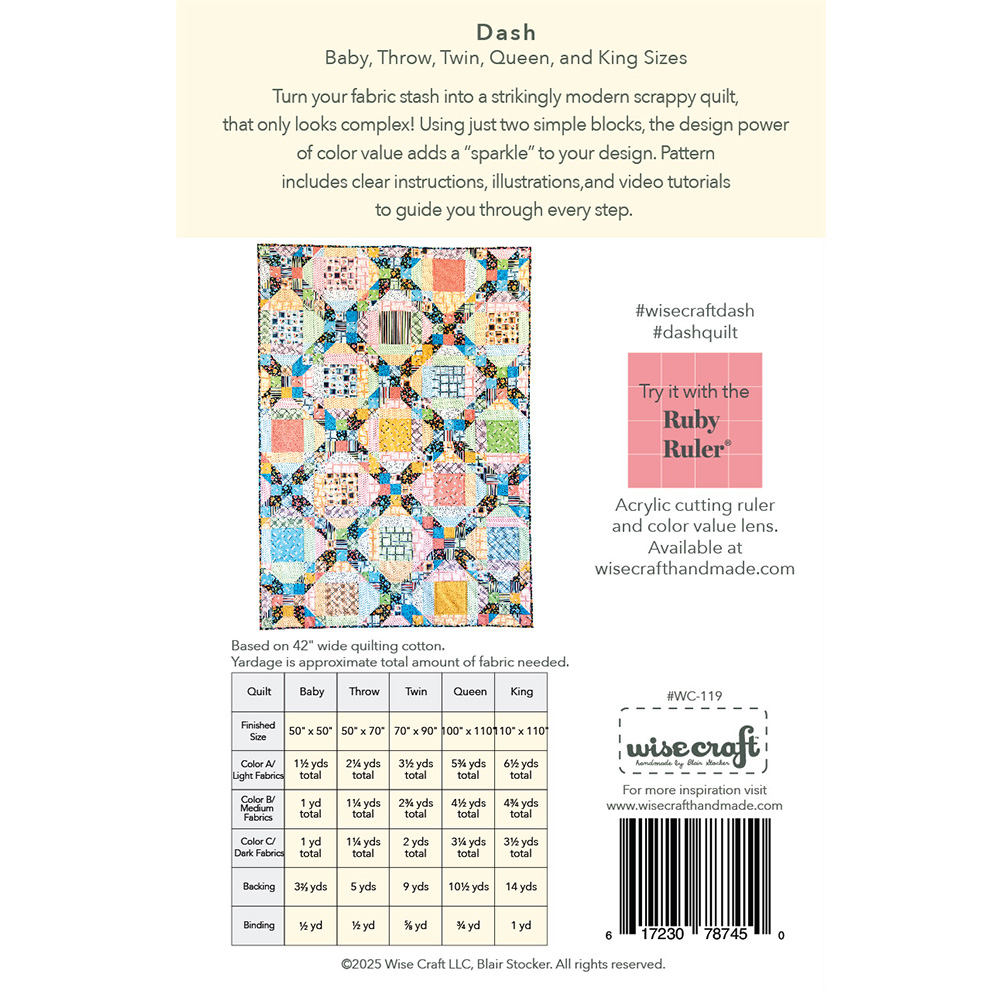
First things first–Gather your supplies to get ready to make the Dash quilt. Below is the front and back of the pattern cover, to show you what you will need. Please note that the quilt along is free to participate, but if you want to make the Dash quilt, you will need a copy of the pattern. Below are links to the PDF Digital Download file (so you can download at home and start right away) and the printed pattern (which will be mailed to you). The Ruby Ruler® color value viewing and cutting ruler tool is optional, but Blair will be showing you how she uses it to determine color value throughout the quiltalong. (If you are not sure what Blair’s Ruby Ruler® is, start on this page to learn more.)
Week One

During this first week, your primary task is to gather the fabrics you are considering.*These will ideally come from your fabric stash (you have one, right?). You should spend some time going through your stash, pulling out any and all fabrics that you want to consider for your version of the Dash quilt (pro tip- pull more than you think you will use). Think about colors and prints you want to see in the quilt, then pull other fabrics that enhance those colors and prints.
Bring all these fabrics to a table or cleared space where you can consider them all together. At this point, if you are going full on scrappy with your Dash quilt, you may have 50 fabrics…60 fabrics… or more! This is totally ok, we are not at a step where you should hold back.
*The next step is to sort your fabric pile into dark and light color value groups. If you have not worked with the idea of using color value before, I’ve got some videos to walk you through what I mean by color value and how to use this idea on alot of different fabrics. It takes a little focus, but I actually think this part is fun, and when you can really get into the true design aspect of quiltmaking beyond just following a pattern.
*If you are planning to make the Dash pattern cover quilt, in the “Pretty Things” fabric collection by Denyse Schmidt, you can download a key to exactly how I sorted those fabrics into color value groups. Please note that this fabric collection was released in early 2025 and may no longer be available.
This week’s videos
Week Two

This week we are cutting all of those fabrics.
I find this part of the process very easy to relax into. I develop a rhythm and a flow with my cutting, and getting everything cut and ready to grab and start creating blocks is so satisfying!
Create a space, put on some music or audio book, make sure you have a sharp rotary blade, and cut! Have fun with it!
Also be sure to watch this week’s video on my essential supplies when making scrappy quilts!
Happy cutting!
Blair
This week’s video
Week Three

You’re probably itching to get sewing. (Did you already sneak in a little sewing?😉)
We will be starting by making all of the A blocks. Since you have cut all the pieces for these blocks, and they are stacked and at the ready, it should be easy to grab different fabrics to be sure that each block looks super scrappy.
I have a video for you this week which shows how I construct each block of a scrappy quilt “Block by Block”. This approach helps to avoid overwhelm at trying to make sense of all those fabrics and colors. Its also a very helpful approach to getting each of the values right in these scrappy quilts.
Let me know how it goes!
Blair
This week’s video
Week Four

This week, it’s time to make the “B” blocks!
The B blocks are not complicated, but they are a bit more technical than the A blocks. And by this point you have be working your design muscles on all those A blocks, so you’re ready to tackle these.
In the video I have for you this week, I talk more about to interpret the remaining cut fabrics you have, using them to make the B blocks. I also discuss my favorite kind of sewing stiletto to help me line up my points (there’s a few in these B blocks).
And… a little confession…
Happy Sewing!
Blair
This week’s video
Week Five

It’s already week 5! If you have stuck to the official schedule, your A and B blocks are completed. If you are going at a different pace comfortable for you, keep going with what you’re doing, you’ll get there!
For this week’s video, I decided to film in a format of video that I, myself enjoy watching on YouTube. My favorite way to relax is watching someone making something, cleaning something, restoring something–anything!–and not talking. Just making. I find myself wondering what they are thinking. If you like these types of videos too, I hope it inspires you to put on some music, clear your design wall, and get ready to play!
Happy Sewing!
Blair
This week’s video
Share your Dash quilt on your favorite social media outlets using #dashqal, #wisecraftdash, #dashquilt.