Emma's Bedroom Redo on Design Mom Today!

DIY bird light
 
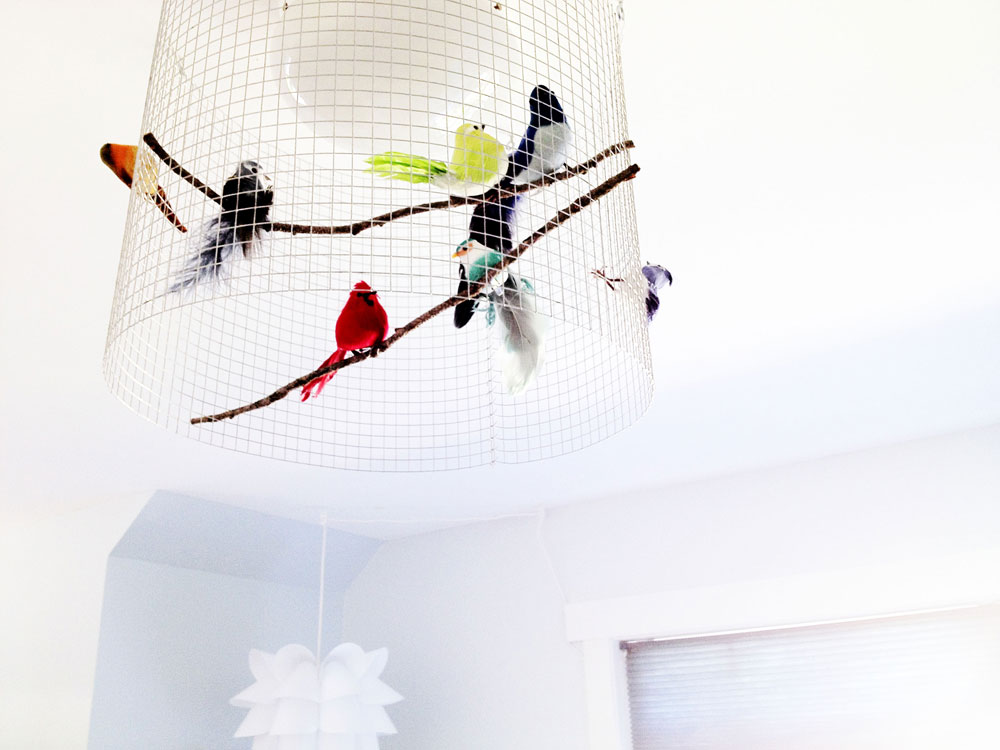
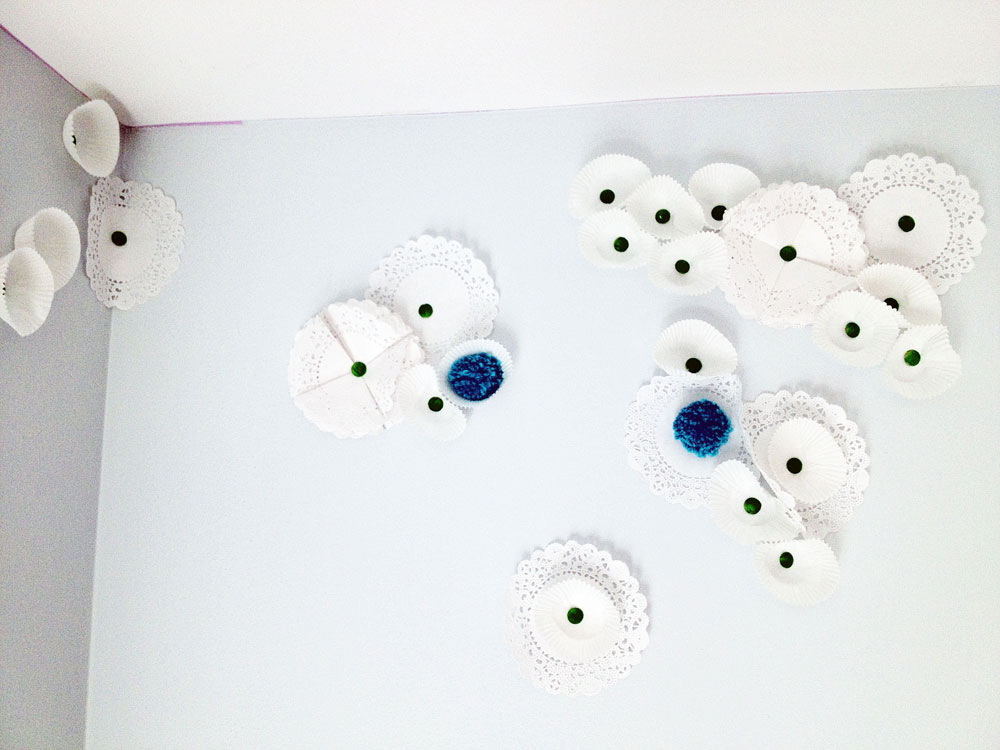
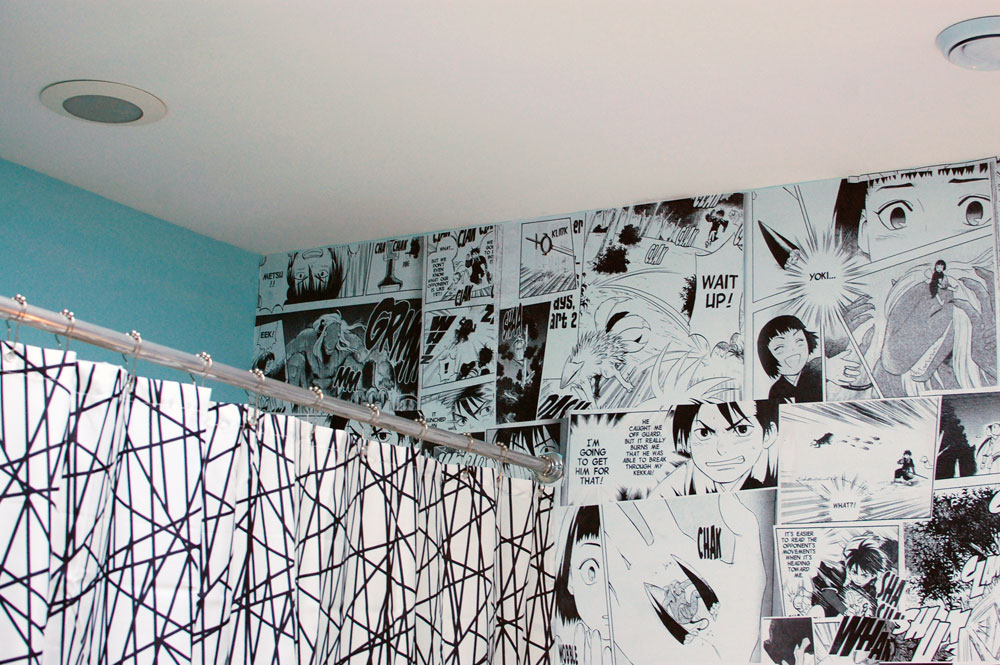
It’s done! (Actually its been done for a few weeks now.) The bedroom redo collaboration between teenager and teenager’s mom was, in the teenager’s opinion, a complete success, and over at Design Mom. The birdcage around the ceiling light in the photo above was my favorite of all the projects Emma and I did to make this room come together. And there were plenty. I’ll be talking a little more about those coming up, but today you can hop over and see the finished room on Design Mom. Gabrielle did the sweetest q & a with me about the whole process of changing this room over. And when I tell you I cried answering those questions, I honestly did. Its exciting and bittersweet to watch my kids grow up.
Go take a look at the before and after over at Gabby’s blog.
Happy Tuesday!

Geode Redo


I bought this geode while out thrift shopping several months ago and its just been sitting on a shelf in my studio ever since. I love the pink striations of the geode, but the back is kind of, well. I think its kind of ugly.
 
READ MORE

DIY Easy Tabletop Redo


I stole a few minutes to myself the other day and went thrifting. I came across this oil painting and found myself buying it. Wasn’t exactly sure why. I don’t see it on our walls, and don’t even particularly like it as a painting. I do like the colors a lot, and the composition isn’t bad at all. The price didn’t hurt either.
READ MORE

Teen Room Redo, Wall Decor Idea

Mother daughter collaborative projects in Emma’s room are turning out to be a lot of fun, thanks to Pinterest.
For about $6, we created our own wall art based on some ideas we pulled together.

DIY Wall Decor Idea

DIY Wall Decor Idea

This is an easy project. Perfect for a 13 year old girl like Emma. Here’s how we did our version.
Teen Room

DIY Wall Decor

Materials:
Thumbtacks
Craft paint and small paintbrush
Piece of scrap foam core or cardboard
Small round doilies
Cupcake liners
Yarn for pompoms
Pompom maker
Double stick tape
Scissors
To Make:
Teen Room
1. If you want the thumbtacks a different color, stick them into the scrap foamcore or cardboard to make it easier to paint them. We painted ours a bright green, 2 quick coats and they were done.
Teen Room
2. We decided to add some pom poms to the centers of some of our flowery shapes, so we made a handful of small ones.
Teen Room
3. To make the doilies into flowers, I folded 4 doilies in half, then overlapped them in quarters. You can attach them to the wall with double stick tape, and then add either a pom pom or a thumbtack in the center.
DIY Wall Decor Idea
4. We started placing the cupcake baking liner “small flowers” in the area designated for this installation, then filled out and fanned from there, adding the doily “big flowers”, really just ad libbing as we went. I think the pom poms added some nice contrast, and we scattered those around and even addd some later on. In the end, I added the leftover thumb tacks plain, around the “branches”. This is on the wall above Emma’s bed, and we decided to keep it fairly tight because of the new bed she has coming soon.


how to make your own anime mural wall

wall murals
Now that the anime mural wall for the kid’s bathroom is finished, my husband Peter did a little write up on his process of redoing the kids bathroom with anime images pasted to the wall, hopefully it all makes sense.READ MORE

Crocheted Granny Square Scarf

crochet scarf

I really have absolutely zero business writing out any kind of crochet tutorial, but this is such a simple project for anyone with a little experience, why not? If you can do some simple crochet stitches, hopefully, you will be able to understand. (I’m actually letting other, more experienced crocheters do the explaining.)
I am still working on what will one day be my granny square blanket (all those granny squares are bordered with cream), I was feeling like I wanted to try out a different set of colors, and that’s when the idea for this came about. I played around with my usual blues (I’m so predictable that way, I know), and bordered them all with a deep charcoal gray yarn I have quite a bit of. The centers of all the granny squares were mixed configurations of a yellow and an ochre yarn, they each take turns being the center of the circle. I decided I really wanted to create a scarf of some kind for myself.
 
The scarf I made is just pairs of the granny squares, lined up beside each other and sewn together, but I left the space between one of the pairs unsewn, like below.
 
That way, I could slip the other side of the scarf inside the space to cozy it up around my neck.
crocheted scarf
 
I tried about 50 different shots of me wearing this scarf and none really showed it well, so you will have to settle for it on the table instead. Here’s how I made it, in case anyone would like to try it.
Materials:
Yarn in several colors. I used 5 colors of Cascade 220– an incredible color assortment and I love crocheting and knitting with it. (I used 2 blues, a yellow, an ochre shade, and a dark charcoal.)
Crochet hook (for my yarn I used H/5.0mm)
Yarn needle or tapestry needle for weaving in the yarn ends
*An updated netflix movie queue (optional, but recommended)
An audiobook you’ve been dying to listen to
 
To Make:
*Start up your first Netflix movie.
I wrote up a tutorial to create the granny squares which you can find here. There are a thousand different ways to make a granny square, this is only one. You will need approximately 20 granny squares, but gauge the length as you’re going along, you may want yours longer or shorter.
*Start up your next movie.
*To attach the squares together, I was taught to sew the squares together with a tapestry needle, but I wasn’t happy with how my stitches were looking (sloppy), so I did some searching around online and found this tutorial from Lucy, which really clicked for me. Do whatever works for you. I attached all of my squares together using this Lucy’s method, attaching the pairs together first, then attaching the pairs to each other (keep track of the pair you would want to keep open to feed the scarf through and don’t connect those together). The pair I kept open was the second pair on the left side of the scarf (right side facing you).
*I worked in my yarn ends at this point, they were becoming a distraction.
*I would suggest switching to an audiobook at this point, prior to the next step.
*To create a nice border around the entire scarf, I did a scalloped or shell edging, following this tutorial.
*I blocked my scarf when it was completed.  You can choose to block or not to block. I block when I want the stitches to look fuller and more even. Plus it creates a more defined shape to the piece.
And that’s really it. Are you confused enough? Should I have added wine to the materials list?
Oh dear.


Halloween DIY Ideas

Decorating with some favorite Halloween DIY’s for the season!
Halloween dishes
 
Halloween Decor Detail

Thrifted dishes with waterslide decals.

Spray Painted Sinister Halloween Ceramics

Spray painted ceramics is an easy, very fun DIY project. (Instructions for both of these projects- and more- can be found in my book, Wise Craft: Turning Thrift Store Finds, Fabric Scraps, and Natural Objects into Stuff You Love.)

I surprised even myself when I jumped into decorating for Halloween as soon as the calendar said October, but I did. I guess doing these projects has warmed me up to the whole idea of Halloween. (Plus, its another reason to rearrange things around here, you know?) I’ve been keeping a few of the completed projects in orange bins down in our basement so that I could easily find them. I still need to put up the black ivy and spider web for the front yard…the kids are insisting.
 
Halloween Decor Nancy Drews
I pulled out a few Nancy Drews with sinister titles for the living room side tables.
I am currently hunkered down and working on Holiday DIY projects and having some fun. I don’t know why I still get surprised at what can be made with humble thrift store items, but I do. The fun is in the transformation!
Halloween Day of the Dead Couple
Little do my kids know, but this weekend I’m taking them to a Christmas tree farm for photoshoot props.
Cause that’s how we roll around here….

The Cranes Released


Our school auction was this past weekend. Rooms full of flowering branches and origami cranes. I must say, it looked really beautiful in its simplicity. (Many of those cranes have been hanging in my studio for a few weeks and I was kind of sad to see them go.) The multi-colored ones pictured above were the 1000 cranes folded by Ian’s 2nd grade class, and were hung from branches on either side of the stage. (We’re planning to give a strand of cranes to each of the kids, the rest for the teacher.) The 3 silent auction rooms were designated by color, the 1st one was white, 2nd was pink, and the 3rd was blue. We folded monochromatic cranes and made simple arrangements in single colors to coordinate and designate which area was which.READ MORE

Color Your Cloth by Malka Dubrawsky

Color Your Cloth
I have a confession…
I’ve never liked batiks. Of any kind. I couldn’t really explain it except to say I saw no inspiration in them. I knew I gravitated toward clearer colors in general, so maybe that was the reason.
But whatever the reason, I did not like them. Until I saw Malka’s work that is.READ MORE

Follow Wise Craft Handmade