October 24, 2012
Emma's DIY Desk
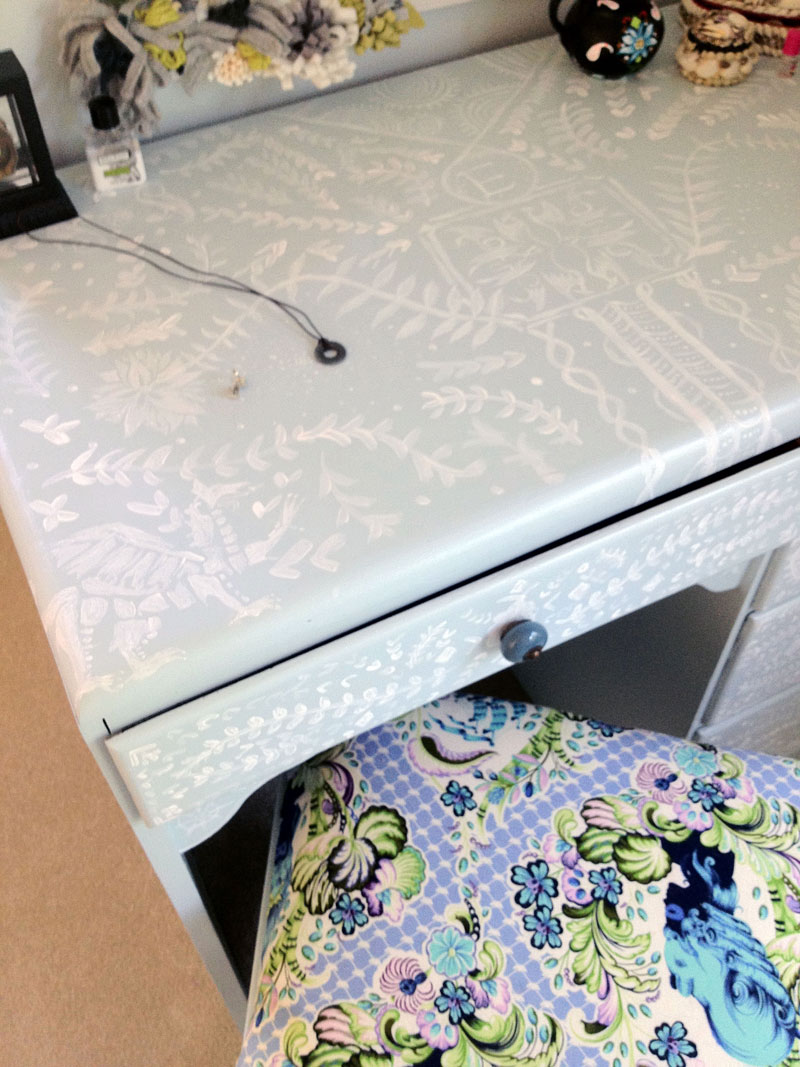
Another project we did for Emma’s room redo was fill the need for a dressing table and chair. There is a bit more mirror time these days before school, and I thought it would be nice for her to have a place to keep all her earrings, lip gloss, and… slingshot.
READ MORE
October 22, 2012
Crazy Star Quilt
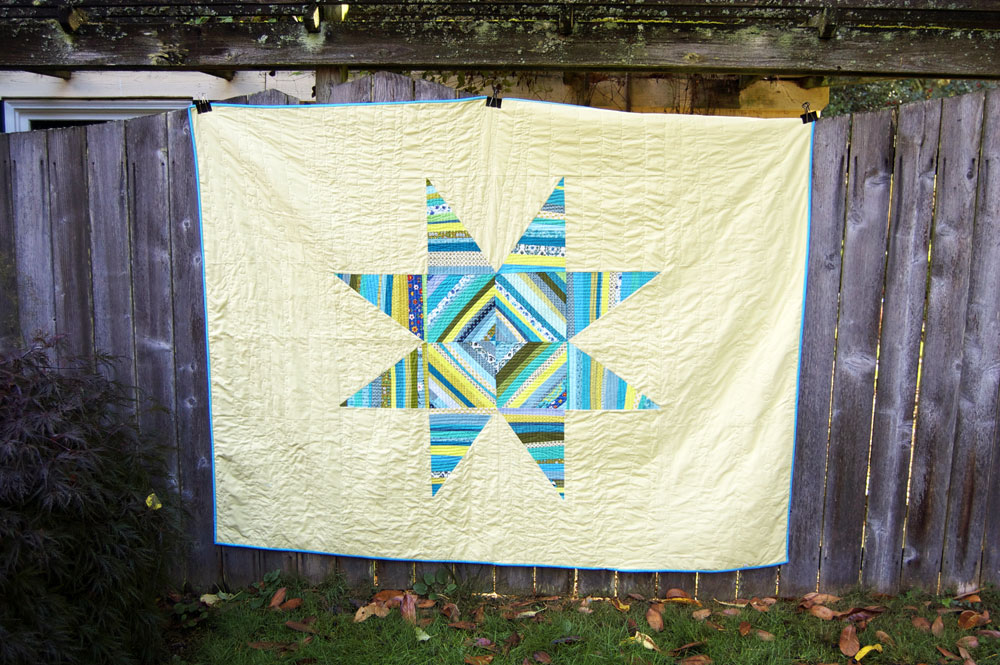
As I suspected, finishing unfinished projects seems to be good for the blahs. I put my nose down toward the sewing machine last week and finished the crazy star quilt I’d started a while ago. I held my breath as I used the walking foot on my Bernina for the first time to quilt straight lines across the star, then continued to hold my breath while I free motioned the entire quilt around the star with loop-d-loops. (Are these out of style? Oh please say they aren’t!). Everything worked just like it was supposed to (I love my sewing machine!) and I finished hand-stitching the binding while Peter and I watched Alaska State Troopers on Saturday night (don’t you want to party with us?).
October 19, 2012
Random
I’m not gonna lie, its been a weird week. Kinda good, I mean Fall! I love Fall… but kinda blah… maybe cause that rain they told us to expect never came. Maybe I just need more chocolate. I know I really need to get myself organized. If I do that over the weekend, next week will automatically start out better.READ MORE
October 16, 2012
Emma’s DIY Headboard
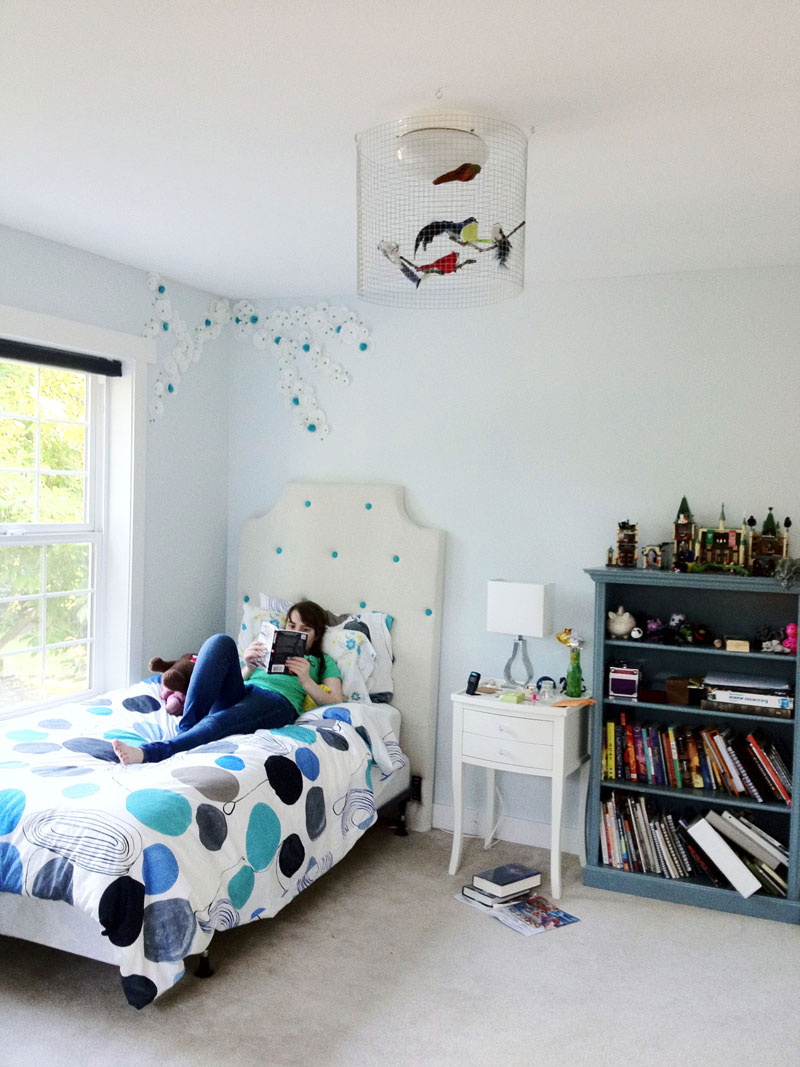
A budget- friendly, DIY headboard project Emma’s room. A little history first- Emma has slept in a great wooden sleigh bed since she moved out of crib (here’s a post from 2006 that shows this bed). It is well-made, really lovely, but the footboard definitely created a visual barrier in a room that stays pretty messy most of the time. I thought it would be fun to change her twin bed to a simple, metal bed frame and make an upholstered headboard ourselves, to give that corner a cozy feel.
October 15, 2012
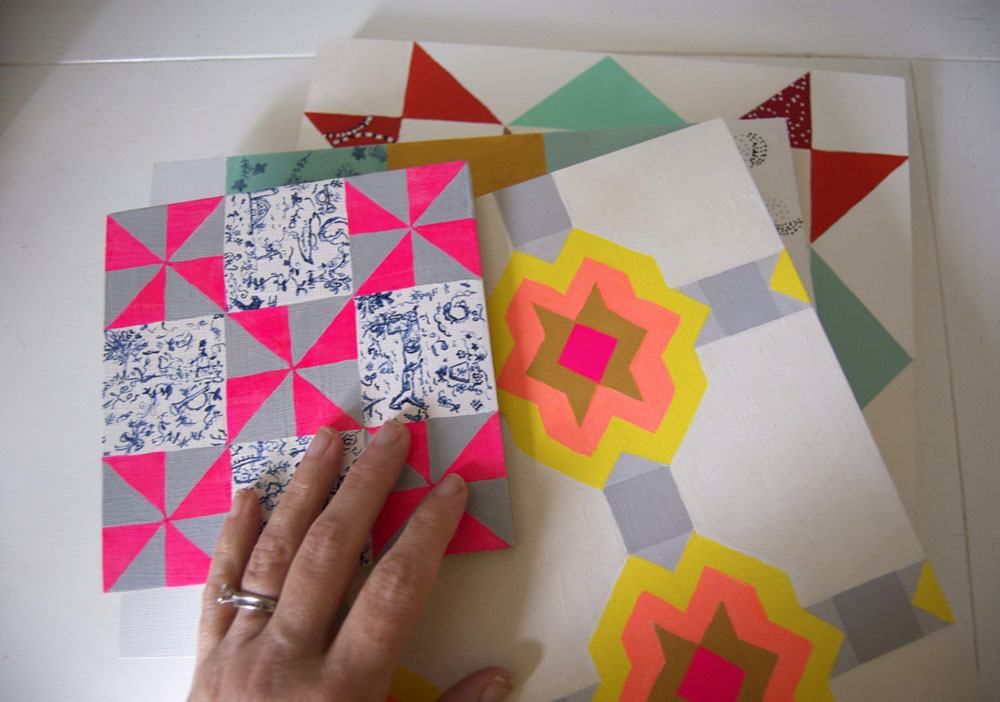
4 New Quilt Paintings
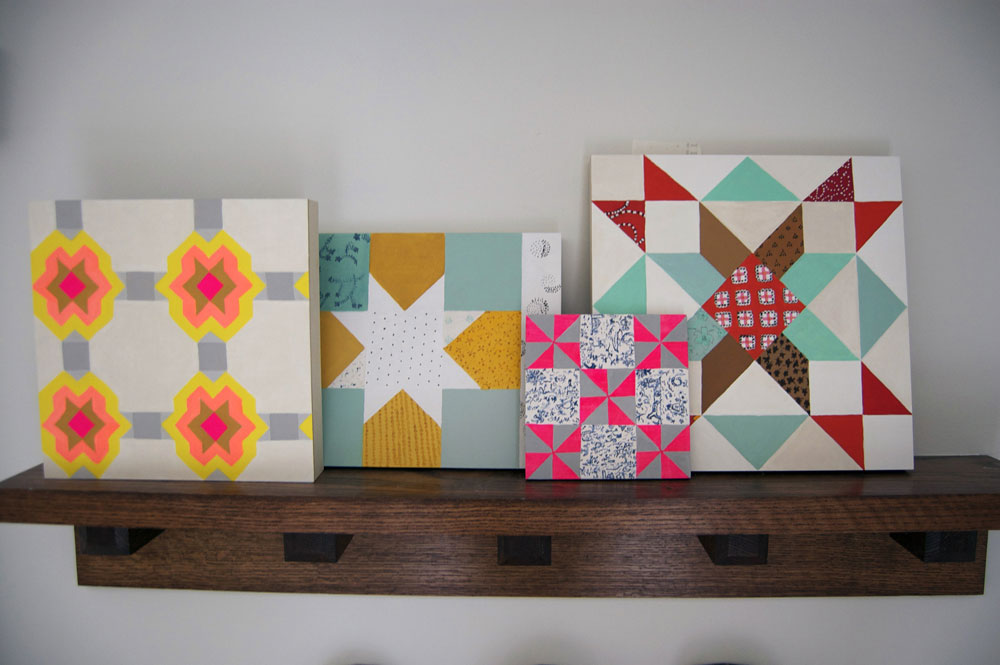
(From left to right: Echo Star, Morning Star, Flutter Wheel with Toile, Turkey’s Delimma.)
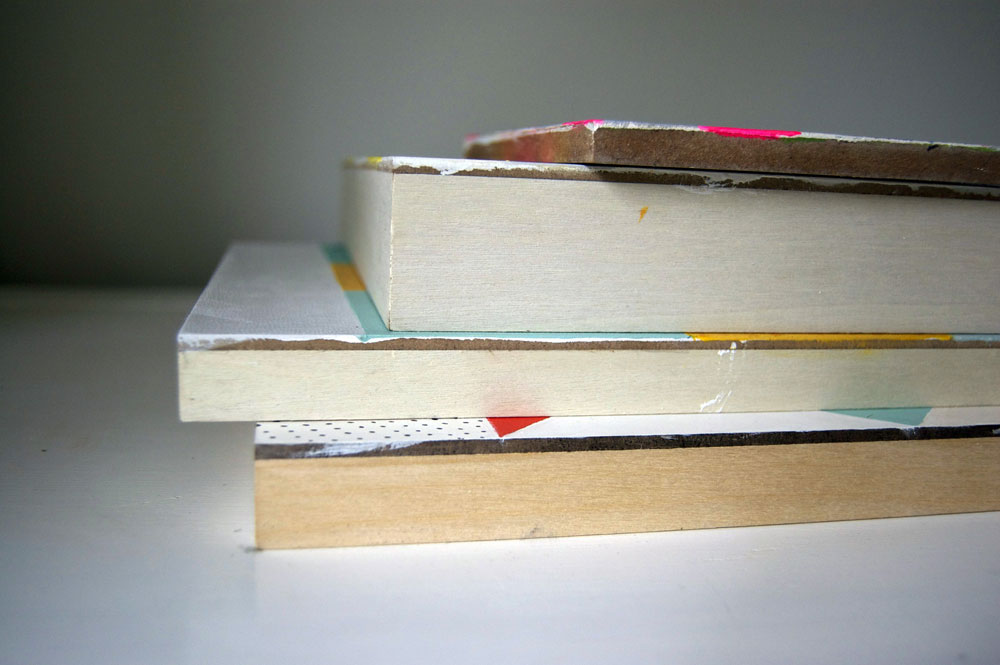
I finished the Morning Star and Flutter Wheel last week, soon they are all four headed to Artstream Gallery in New Hampshire. Its fun to see them all together. That second picture up there shows the sides of the pieces, which has some smudges of paint. Should I paint the edges? Leave them as they are? What do you think? A part of me likes the layers and layers of paint just seeping over the edges a bit, but not sure if you’d want to see that when the piece is hung on a wall.
The rain returned over the weekend, after a record stretch (near-record? record? I can’t keep up) of no rain in Seattle. I missed it, I’ll admit. Was quite happy to curl up in my chair with my crochet hook and watch it drip outside. Finally gave in and started watching Downton Abbey, almost through season 1. Yes, I love it. Peter’s watching a 24 episode documentary on The Cold War. Emma is making more clay dragons and Ian is making stop motion animation movies. Gracie is napping. Tonight is baked potato night.
That’s how we’re rolling.
Getting some interweb inspiration for Halloween. We need to focus on costumes this week and next. I always make this process way harder than it needs to be.
Simple, Blair…simple.
Take care for now friends.
October 11, 2012
My Tools for The Sketchbook Project

(Above sketchbook page from a photo I took at the Ballard Farmer’s Market a few weeks ago).
I got a few questions on my sketching post last week about tools I’m using when I sketch, so I thought I would write a bit about them. Let me say that I am no expert, not by a long shot. I began The Sketchbook Project to put the time in to learn the basics. For me, that’s the best part! I approach this whole process like I do any new craft, with eyes wide open, finding out all I can about tools and techniques from those that know a lot more then me.READ MORE
October 8, 2012
An Expensive Bird Cage Light DIY
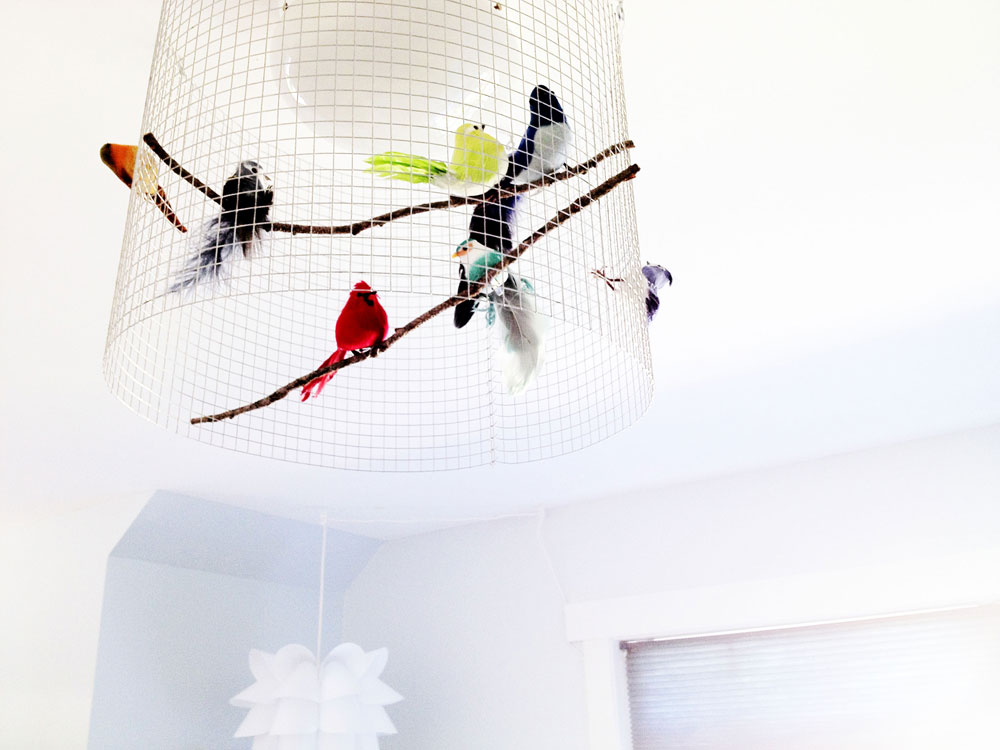
These bird cage lights from the Conran Shop have been around for a while now and I’m completely obsessed with them. So gorgeous. The last time I was crazy for something like this, Atilla arrived, but La Voliere is way out of our budget. So, I gaze at them online.READ MORE
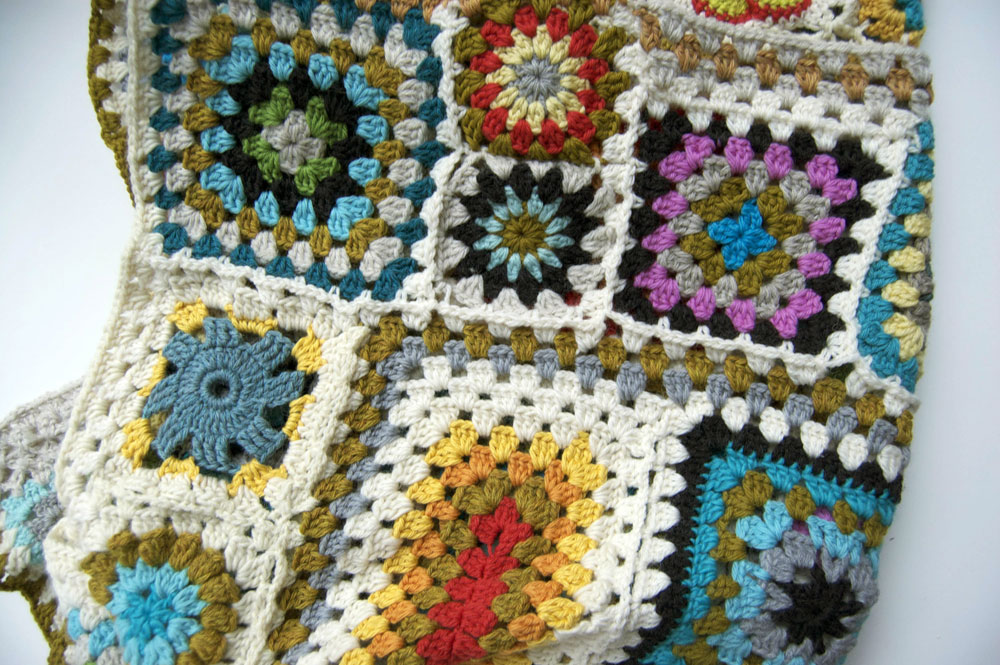
October 5, 2012
Granny Square Sampler Project- Week 18
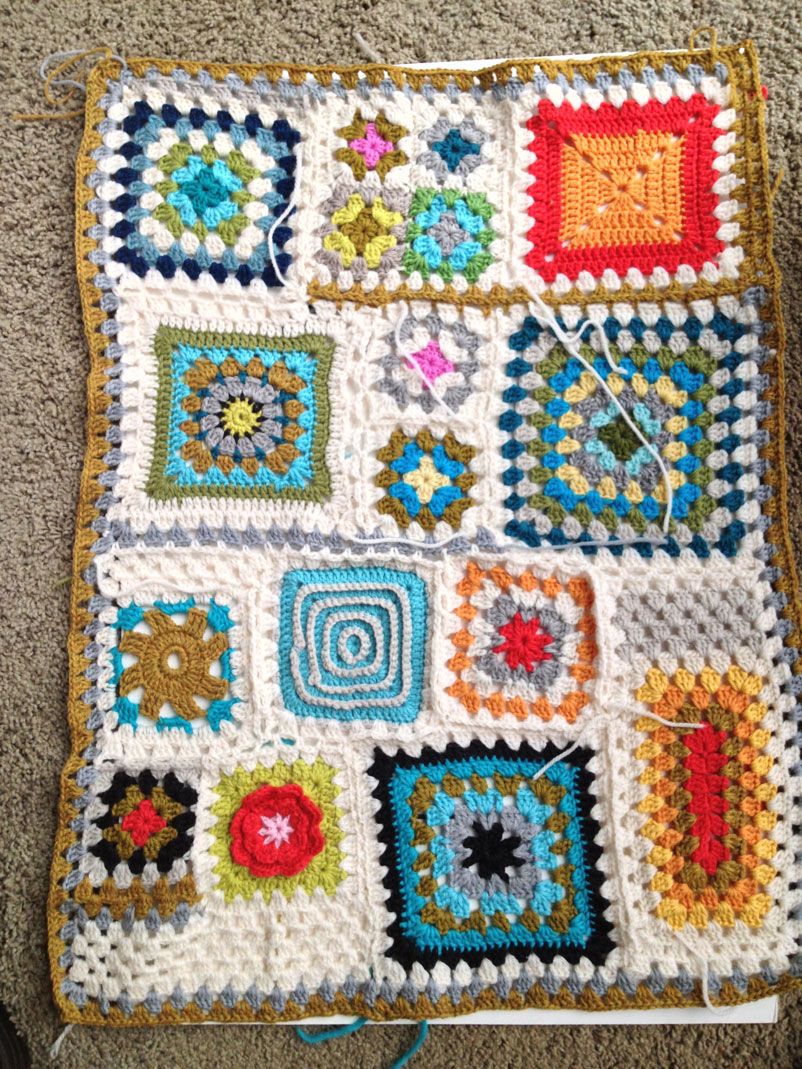
(All the granny square assignments can be found on this page.)
I just looked at the Flickr group at the finished afghans, GORGEOUS! Wow! I am so glad you guys kept going with it and didn’t wait for me to post. I love how different each one is!
READ MORE
October 4, 2012
hushpuppies

Let's just say my diet as an adult is drastically different than the diet I had as a kid growing up in North Carolina. Don't get me wrong, I have nostalgia for the fried chicken, cornbread, overcooked beans, and sweet tea that I had in my youth, but haven't eaten most of that in many years.
But sometimes, I get the urge to eat something from my childhood.
Like the other night. I was making crab cakes with tartar sauce and decided that we absolutely had to have hushpuppies to go with them. Those little fried bits of dough that I always ate with my fried calabash shrimp as a kid. When done right, they are just the perfect combination of sweet and savory, and really quick to make.
Note: You can add corn kernels in addition to the cornmeal, and add diced onion instead of onion powder, but I make these the way I remember them, which is with no hint of vegetables in them.
Hushpuppies
Makes about 24 Tablespoon sized puppies
Ingredients:
Canola oil
1 cup all purpose flour
2 cups yellow cornmeal
2 tsp. sugar
2 tsp baking powder
1 1/2 tsp kosher salt
1 1/2 tsp onion powder (or 1/2 of an onion, finely chopped)
1/4-1/2 cup milk
To Make:
1. Fill a heavy bottomed pan or pot with about 2"-3" of canola oil (you want the oil to cover the hushpuppies when you drop them in). Start heating the oil over medium heat.
2. Prepare the dough. In a bowl, mix the flour, corn meal, sugar, salt, baking powder, and onion powder with a whisk until combined. Add the milk, starting with 1/4 cup. Mix in just to combine, the dough should hold together when formed into spoon sized balls. (Only add more milk if needed.)
3. Drop spoonfuls of the dough into the oil and allow to fry, untouched, for about 5 minutes, or until light golden brown. Remove from oil with a strainer and put on a paper towel lined sheet to drain.
These don't keep well, so only make what you'll eat.
Enjoy!